Tuesday, December 4, 2012

"I fell asleep at the kitchen counter" or "The sad tale of woe that has caused me to resort to writing letters to Santa"

My letter to Santa, who apparently knows the people at Silhouette America

I have a sad tale of woe to tell you. A sad, tragic tale of terrible woe.

Let me first start out with a visual aid. This is me:
There are so, so many things wrong with this picture. For instance, what is up with that hair? Someone get that woman a haircut! A cute, sassy one that makes her look more "Mom" and less "stay at home"! Anyway...this is how I've been feeling the last few weeks. This is called "Craft Fair Season".

I make signs out of wood and vinyl. Really cute, possibly unique and thankfully easily sold signs out of wood and vinyl. I make these signs to sell at craft fairs, alongside my husband and children, who also make cool things out of wood. We are what you would call "DIY"ers, also known as, "Sorry kids, you want that, you buy it yourself. What? You are only 8 and you don't have a job? Here's a piece of wood. Make something out of that and sell it." This is not just a fun hobby, we are trying to turn this into a family-oriented side business to teach our kids some stuff (super valuable stuff - like about taxes and tithing and using power tools) and help the family finances.

So I have been making these signs pretty steadily for a couple months now for the Christmas Craft Fair season. They've been selling well...which means I need to make more. Herein lies my sad tale of woe. I have a Cricut. Two, actually. They work very, very hard for me during Craft Fair Season. But, it takes me a painfully long time to use them. Punching the letter buttons for every single word - over and over for the more popular signs that I need lots of duplicates for- and having to enter more text after every 2 minutes of cutting.  It takes HOURS to make a bunch of these bigger signs. I am completely maxed out on my time to sign creation ratio. A lean, mean cutting machine we are not.

So, I decided to look into an upgrade - something more time efficient and more versatile. I found out about...The Silhouette Cameo. And now I want one BAD. I mean SUPER bad. I even found a good sale on Black Friday and had my fist full of cash all ready to go. Here is where the sad tale comes to the woe. As I was looking at the great deal I found on the computer, up comes my eldest daughter, informing me that she can no longer fit her feet into her snowboots. Neither can my youngest daughter. It was snowing. Right then. Oh, and her PE shoes and church shoes don't fit either. And basketball starts in a couple weeks. And her other sister has grown out of her PE shoes, too (The boys were in it for the win that night - both still had shoes that fit).

Dang it.

There went my Silhouette money.

And so I am now back to looking like the above picture. Grateful for the business, but so, so tired.

I am BEGGING Santa to help me out. My house looks like World War III. My son is happy as a clam because I haven't bothered to stop him from wearing his sweatpants for two (hopefully only two...) days in a row. My little kids are throwing Cricut cartridges when they get their hands on them - usually at me.

For the love of Pete, I have GOT to get me a Silhouette. Faster, easier, more precise vinyl cutting? Yes please! No more punching and repunching the same buttons over and over again? Yes, please! Saving all my files on my computer and just...cutting it...because I told it to? YES PLEASE! Cutting fabric, paper, whatever else I can reasonably think of to make gifts, decorate our house, dress my children or preserve memories? YES!

So there you have it. I am appealing to Santa. That's how desperate I am. My kids are pleading, too:
This is their "please please please please please release our mother from vinyl hell" pose.

I realize that I am greatly blessed - no one is in the hospital, we have talents and skills to help out in a time of need, we are able to help others and are happy together...I am just a Mom trying to help out her family and am in need of an upgrade to keep pulling this wagon.

If you feel that you need to appeal to Santa as well, you can also give this a try (thanks, Silhouette!): CONTEST

("Hopeful eyes" or "Crazy eyes", depending on you look at it)

Sunday, December 2, 2012

Elf on the Shelf, Meet Snowball in the Box

It's finally Christmas Month,which means the interwebs are buzzing with the worldwide exploits of  cute, naughty "Elf on the Shelf".
I totally dig all the fun photos my friends are posting of their creative, super funny elves, but haven't gotten into the phenomenon myself for a few reasons:

1.) I am too cheap to spend $30 on what boils down to a stuffed toy that will see the light of day for 25 days each month.
2.) After 5 children, I don't have enough of a memory left to actually remember to do the elf antics each night, nor do I trust that I won't be lazy enough to come up with something funny every day. And, I don't want to clean up after the "elf". Let's be honest.
3.) Two of my 5 children are now old enough to have figured out the whole Santa thing, and I still wanted something that motivate them to step up it up this month.
4.) As super cute as Elf on the Shelf is, if I'm going to start a new tradition for my kids, I want it to be something more meaningful for the Christmas season.

And so, "Snowball in the Box", a collaboration between my 8 1/2 year old daughter and I, was born. 


Basically, we took a Pooki Scentsy Buddy (which was FREE because I had hostess credits from a Scentsy party I did with this girl: Mandy Lowry) - although any stuffed animal or doll would work- which comes in a handy box, and turned him into a Santa's Helper. We used some scrapbook supplies to cover up the Scentsy logo and gussy up his winter castle. Total time: 30 minutes. So, we are now into this zero dollars and 30 minutes. I can live with that.

Snowball's mission is two-fold: 1.) He watches the kids during the day to report to Santa at night on their helpfulness and good deeds (which will sometimes result in notes from Santa or little treats...Hershey's kisses for everyone making their bed before school? Yes, please!) and 2.) If he gets back early enough from his visit to Santa, he might do a good deed for one of US. 


Basically, I took Elf on the Shelf and turned him away from the dark side. Jedi bear? You betcha.

And, because its me, and I never miss an opportunity to trick my children into learning an important life lesson, there is indeed a mighty catch. The 8 year old is really Snowball's eyes, ears and hands. SHE is the only kid in on the secret (the 10 year old might be brought in later...but I have other plans for her this month...), and will be the one watching for good deeds (to report to Mom), and actually DOING the good deeds at night most of the time. She might fold someone's laundry and set Snowball on top, or fix her little sister's book and prop it up in the chair with Snowball, etc, etc.  She is ridiculously excited to be part of the "Christmas magic"...and I am ridiculously excited for her to serve others at home without expecting anything back. Happily.

I get to motivate the younger ones to behave and motivate the older ones to look for ways to serve others...I'm basically calling this one a win-win before the month even begins!

What traditions do you have for your kids to help them remember to behave during a busy, stressful time of year and do service in your home?

And, by the way, to my Elf on the Shelf friends -- I will be checking facebook daily to see what your elves are up to :)

Wednesday, May 30, 2012

Summer's First...Craft.

My kids know that the beginning of summer means one sure thing...Mom will surely manufacture a new chore chart and reward system, and come up with some cutesy paper crafted schedule. We all know it will only work for the first half of the summer, at which point we'll go out of town and everything will fall apart when we get back...

But this year - I have been empowered by Pinterest, which has showed me that the whole "family command center" thing is awesome for the entire year AND quite possibly a little bit trendy. Well, trendy in Pinterestland, which is about as trendy as I ever get. 

In honor of kicking off a Pinterest-inspired, organized summer, I give you: Part One of the Family Command Center. Us crafty people all know that nothing is official until you've created something to commemorate it, so - Organization, meet crafty calendar board.

I made this little beaut for approximately $2 and 30 minutes- yay me! 

The parts:
Frame with plexiglass: 25 cents at a thrift store
1 piece of blue cardstock: 25 cents in a huge multi-pack
Simple Stories elements: approximately $1.50 worth from a huge multi-pack


As I've talked about before, Simple Stories is awesome - each set (this is the Year-o-graphy set) comes with 12x12 double sided cardstock (the calendar page above was one of these) plus tons of cut-apart journaling cards of all different sizes (all the other pieces above) and stickers. I literally just cut stuff apart and glued it onto the cardboard in the frame. I added a few stickers and word strips and ALL DONE! My kind of project - thrifty and crafty!

 We use a dry-erase pen to write in all the necessary info:
Now we have the months' calendar, the day's activity/schedule, shopping lists, long term to-do list, garden weeding list (we cross of each item as we do it each week) and reminders...all in one place! It's right next to the chore chart (I will show you later...), so everyone sees it. 

I'd like to think everyone in the family frequently looks at it because its so cute, but I suspect they take a look hoping they'll see "eat ice cream" or "go to Disneyland" magically appear on it... eh, maybe I should  add little surprises on it from time to time. I'll start with "Make a Pinterest-inspired menu board"...

Friday, May 4, 2012

Homemade Laundry Soap for Cheap People

Since I've been spending so much time messing with clothing and fabric, I thought I'd share one of my more brilliant money-saving moves with you. Have you tried making your own laundry soap?? It saves SO much money and is so ridiculously easy. I have been trying different recipes and concoctions of various types for a couple of years now and finally came up with a mixture that works really well for me. I will share it with you -- with the caveat that I developed this for my front loader (your machine's warranty may be voided and/or the machine damaged by using homemade laundry soap...please do your own research first) , super hard water (laced with lovely red clay) and ingredients available near me. What works for you and your situation may be completely different...so I suggest you do a little research yourself.

This recipe cleans like mad...but hasn't done much to prevent my whites from turning dingy (which happens no matter what storebought detergent I use, too) - so I am still working on that part.  I also do not use this for my baby's cloth diapers - I use Rockin' Green for that.  For all I know, Rockin' Green could be made of the same ingredients in different proportions, but its working as is, so its staying. I should also mention that since I have a septic tank -- I have looked up all the ingredients separately and they all *appear* to be septic safe. Use at your own discretion...

Anyway... here ya go. Let me know if you try it and how it works for you.

Homemade Laundry Soap for Cheap People with Hard Water:

Ingredients (all can usually be found at a typical grocery store):

1/3 Fels Naptha soap bar, grated (other recipes online use castille or other soap - I haven't tried any of those, since I didn't want to spend $5 getting a $2 bar of soap shipped to me...)
1 c. Washing Soda
1 c. Baking Soda (note that these are different sodas...find washing soda in the laundry aisle, with the borax and fels naptha...baking soda in the, you know, baking aisle)
1 c. Oxi-Clean (cheapest in bulk at Costco or WalMart)
1 c. Borax
A couple drops essential oil (optional) - I like lemon and lavender for the smell and natural anti-bacterial properties

Directions:

1.) Add all ingredients to a food processor and process until it blends together into a fine powder.
2.) Don't open up your food processor right away - wait about 10 minutes for everything to settle so you don't end up breathing in the detergent dust (just trust me on that one...).
3.) Put into a container with a lid and wash clothes with it.

That's it.

I use 1 Tablespoon (yep - ONE tablespoon) per load for my front loader. I would estimate a regular washer would probably use 1/4-1/3 cup, but I really have no idea, so you'd have to experiment there.

Now that you have the recipe, let's compare costs. You can buy all the ingredients to make at least 3 batches (plus leftovers of some ingredients) of this stuff for around $10 ($3 or less per batch). I've found that 1 1/2 batches is pretty equivalent to the amount of loads I can do with one of those big liquid laundry jugs from Costco, which cost $15-20. So...we're talking $10 versus $40 for 3 batches. Yeah. I'm in.

$30 savings ...think of all the awkward clothes I could buy at the thrift store to refurbish for that :)

Thursday, May 3, 2012

Health...ier Applesauce Chocolate Chip Cookies

Today my 3 year old and I made up a "healthier" cookie recipe. I know, I know - there isn't any seaweed or acai berries or whatever - it could be healthier - but this is a step UP from regular chocolate chip cookies, and doesn't contain anything you can't get from your own pantry or a regular grocery store. They are also not the prettiest cookies ever, but these cakey little goodies satisfied our sweet tooth and will work great as a wholesome after school snack for the kiddies! They kind of taste like muffins...but a cookie...and let's face it - calling something a "cookie" gives us a little leverage in getting our kids to eat it, right?

I just caught my little helper trying to sneak another one off the counter, actually...


Healthier Applesauce Chocolate Chip Cookies

1 c. unsweetened applesauce (you want relatively thick applesauce that will round up on a spoon...if its too thin, you'll have melty cookies)
3/4 c. raw honey, soft or melted (but not hot)
1-2 tsp. vanilla
1 1/2 T. plain Greek yogurt
2 1/2 c. whole wheat flour
1/2 tsp. salt
1 tsp. baking soda
1/2 c. chocolate chips (pulse in a food processor until the chips are broken up, but not mush)

Mix together the applesauce, honey, vanilla and yogurt in a bowl. Mix the flour, salt and soda together in a separate bowl and then add to the applesauce mixture until blended. Don't over mix. Your batter should be thick and keep its shape. Stir in chocolate chips. Drop by rounded tablespoon full onto a cookie sheet, a couple inches apart.

Bake at 375 for 10 minutes (your oven may need a minute or two less or more) until light brown and firm. Remove from cookie sheet and cool on wire rack. Depending on how much dough you eat (no eggs! Eat your heart out!), this is approx. 2 dozen-ish cookies.

I am not a food scientist, so I will just say: results may vary...if they don't turn out, sorry ;)


Friday, March 2, 2012

The Project is well under way...

We (and I do mean a very hearty WE, as my kids are totally getting in on the action) are having a BLAST with Project Free Wardrobe!!! I have a pile of partially finished projects (because really...who wants to change the sewing machine thread more than you have to?), and a few finished ones, and a whole lotta "to be something else" clothes sitting here.

First of all, I did this sweater the other day and successfully wore it in public (the dentist's office and grocery store didn't know what hit them, let me tell you).  Unfortunately, a bunch of my latest projects have no "before" pictures to go with them. I'm ashamed to admit that my daughter had to HIDE HER CAMERA from me while she went to school, since mine is broken and I kept stealing hers. Pitiful, I know. You'll just have to imagine the transformation that took place here.

This sweater started its life as a giant 3XLT men's henley sweater - it was even too big for my husband, who is a big guy. So, I sewed new seams, cutting out all the excess, along the sides and sleeves. I cut out the henley part and serged the new neckline. then I cut off the bottom couple inches, made a band to fit my hips, and sewed it back on.  The sweater:
It's totally not perfect, but it is very, very me - I'm a neutral kinda girl, what can I say?

This is what Project Free Wardrobe has done to my kitchen table:

Whoops. Sorry, family.

Remember how I said "WE" are getting excited about this project? Well, today my second oldest, age 8, decided to try her hand at a little sewing (Santa brought her a REAL sewing machine for Christmas this year). I seriously could not be more proud - her shirt turned out DARLING!!


 Cute little "pillowcase" shirt - she even added some lace to the bottom. Didn't that turn out cute??
Of course, now that we're trying to be a little less frumpy around here, we had to accessorize her. She tried out my first attempt at an infinity scarf (free fabric from my stash):

(P.S. - my 10 year old daughter took that photo - isn't that cute? She's already had some pretty successful shots using depth of field - mama is so proud).

We HAD to do a little refashioning, too, of course, so we picked out a giant shirt from the PILE on the table - this one was so big, it may have qualified as a tent in some countries - so I just sewed up the two sides, cutting off the sleeves and taking out about 1/2 the bulk - to make a cute skirt to go with it. 5 minute project - can't beat that.

The final product:

SO CUTE, right??! And so, so free!!

Stay tuned...there are lots more projects to show you soon!!


Tuesday, February 28, 2012

Project Free Wardrobe

I must give most of the credit to my new project to Pinterest, and a whole slew of mommy-blogging/tutorial-writing/bargain fashionista types. These Pinterest-worthy bloggers make adorably cute, trendy clothes to fit their adorably cute, trendy, teensy weensy bodies. For those of us who actually LOOK like we were ever pregnant and gave birth to our brood (I have 5), this can be a little intimidating...so I decided that SOMEONE needed to pull some of these ideas together for the rest of us.Well, that and the fact that I have lost enough weight this year to need new clothes - but not enough to want to invest any money into it yet & needed a solution.

Solution: Project Free Wardrobe

This is my effort to make myself a new temporary wardrobe - for free - with as little effort as possible (because, come on - that's the way I roll!). I am also not naturally a trendy dresser - I am perfectly comfortable in a pair of jeans and a T-shirt, generally barefoot. "Clean" and "not falling off" are wardrobe wins in my book. However, I am realizing that I will get a lot more mileage out of my wardrobe - and not look as tired as I feel - if I put a little more effort into things. Therefore, I am going to try to learn a little more about how to not always LOOK like I gave birth to 5 kids and don't have any clothes that fit. I will share with you my finds and efforts!

So....here we go!

Part 1 - pants. I dug out a pair of two-sizes too big cords that I LOVED back in the post-partum period, but had marked for the reject pile. BEFORE:
(do you like the lotion fingerprints on the mirrror? thanks kids...)

 I'm sure there are more professional ways to alter pants - but this is my TEMPORARY wardrobe, and I hope to alter these again in a few weeks as I lose more weight, so this works for now! SO...all I did was turn them inside out, put them back on and mark with pins where I wanted to shrink them up (along the outside seam). I just sewed up my lines (being careful to not catch pockets, belt loops and snaps in my seam), all the way to the waistband (I'm sure if you were using heavier fabric, you'd want to remove the waistband first - I didn't really care with these...), tried them back on for fit and then serged the seam to finish it and reinforce it a little once I was happy with it. I'd forgotten how much these stretch out during the day (thanks, Old Navy), so I should have made them a titch tighter than I'd want them to end up...I will definitely be taking these in further later.

Part 2: I had some knit striped fabric I'd gotten from a "free to good home" pile at church. I started using this tutorial at Merrick's Art. See how cute she is? Let's just say my first attempt showed me that teensy, weensy mommies and tall, notsoteensy mommies probably shouldn't be wearing the same shirt. SO - I Sandyized it.

First, I added a wide band to the bottom (two layers of fabric, fits tight across hips). Then I opened up the neckline a little and added a very easy cowl neck (I will do a tutorial on this eventually - first I have to figure out how to do it without HAVING to wear a cardigan over it to hide the sticking out seam...).

Adding a cardigan from my stash (because my kids call this "the jail shirt" and because I wasn't super happy with the way the sleeves turned out...) and pinning down part of the cowl with a pin that my Mom and daughters made for me out of felt and hot glue, and whala! I may have actually created my first possibly on-trend outfit ever. If its not actually on-trend, just don't tell me...I promise its better than what I have on right now :)
 And here we go - shirt (oh yeah, I also tied a piece of leftover fabric around my hips - I'm not sure if that's a helpful addition or not, but I liked it), cardigan and newly smaller cords:
Now I just need a haircut, a camera (I am ashamed to say that I had to borrow my daughter's...) and some new shoes and I'm in business! Note: shoes don't count towards Project Free Wardrobe, since I am not going to be making my own shoes...something about size 12 shoes made out of T-shirt fabric - in the snow - just doesn't do it for me...).

So, what do you think? So far so good? Next step - cutting apart some old maternity shirts to make some non-maternity clothes. This could be awesome - or totally a disaster. I will show you either way.  :)

Anyone else want to join my project? You don't have to be much of a seamstress - if you're using clothes you were going to get rid of anyway, you have NOTHING to lose! Grab some scissors and a sewing machine (or hem tape) and get going!

Thursday, February 2, 2012

The post where I hang my head in shame and promise to do better...

Oh, my poor blog. So sad, so lonely, so neglected! I am bound and determined to get back on the blog-wagon and grow this thing this year! I have been making all kinds of things - some successful, some not - and can't wait to show you what I've been up to!

Our house is neck-deep in projects - a little hallway revamp that features some chalkboard paint, new faux-roman blinds going up in the dining room, some cool old-picture-frame stuff...there is lots going on!

Lately, I have totally fallen in love with Pinterest!! I struggle keeping track of regular bookmarks on my computer - I never remember what's what, and as a super visual person, its hard to sort through a bunch of links to find what I need. Pinterest has been a GENIUS solution for me! I can save PICTURES of what I want to look at later, and then find things easily. SIMPLIFYING MY LIFE! Yes!

Along with all the cool Pinterest-ed ideas, however, can easily come that overwhelming, "OhmygoshIcouldnevermakethat" feeling, followed by the "thathugeto-dolistmakesmefeelguilty" feeling. That's where I will come in - specializing in making things look harder than they really are is my SPECIALTY!

Watch for my upcoming "Pinteresting Knock-offs" posts to check out my take on all the cool things I find on Pinterest...and suggestions for simplifying and easily creating these ideas on your own...

Talk to you soon!!

Thursday, October 6, 2011

Life's Celebrations Blog Hop!


Welcome to Creating In Real Life! Today we'll be "blog hopping" all over the internet to check out projects made by MemoryWorks TeamWorks members using the latest Simple Stories collections!

Today I will show you a few projects made with Simple Stories Generations. This beautiful line is a mix of darker, muted colors with a touch of "antique" - perfect for a heritage album or those black-and-white family pictures! Celebrate your Family in style!

First is a layout, using some 12x12 paper, a 6x12 card and two 4x6 cards...layered with lots of stickers! I also stuck a couple of smaller journaling cards behind the photo as pull-out tags:

 Close-up of some sticker layering:
 The tags (note: I put some cardstock on the back of the right side of the heart sticker so it wouldn't stick to the tags):

Next up is a "heritage" card, made completely with patterned cardstock and stickers from the Generations line (well, plus a piece of twine..which is the perfect accent for Generations!):
Next are a couple of mini-albums, perfect for a make-and-take, stocking stuffer, teacher gift or brag book! Using 1 12x12 sheet of 2x3 journaling cards, I put 1/2 together with a binder ring for one mini, and the other half in tiny page protectors (bound matchbook style). Add a couple of stickers and a little ribbon and you're done!

Here is the Binder Ring album:

 The mini page protector/matchbook album:

Please be sure to leave comments at all of the stops on our hop today for a chance to win the Grand Prize - the more blogs you visit and comment on, the more chances you have to win!

1. MemoryWorks
2. Christy
3. Danielle
4. Jade
5. Kelly H
6. Lacey Igo
7. Lisa H
8. Sandy (YOU ARE HERE)
9. Sarah J
10. Sharon
11. Sheri
12. Shirelle
13. Susan
14. Simple Stories


Happy Hoppin'!

Thursday, July 21, 2011

Giveaway at RisC

Check out the new blog of a friend of mine -- She's a SAHM who makes super cute stuff (jewelry, hair stuff, hats, etc.) for her etsy shop and is giving away a couple of fun things this week when she gets 50 followers!

Go to RisC Handmade to enter! Good luck!

Friday, July 15, 2011

Tour my space!

Go see a tour of my "craft room" on the MemoryWorks blog today!

Thursday, July 14, 2011

Simple Stories Blog Hop! 100 Days of Summer, baby!

**Note: The Blog Hop starts officially at 10am MST...if some of the links to other blogs aren't working yet, try again then :) ***

Hello!

Welcome to my oft-neglected, but always loved, little crafting space on the web! Today I am showing you some fun projects made with the Simple Stories 100 Days of Summer scrapbooking kit, as well as a few other goodies.

Simple Stories is an AWESOME system developed by MemoryWorks founder Amber Crowell. The kits include doubled sided 12x12 paper, as well as double-sided element cards in various sizes to use for titles, photo mats, journaling blocks, etc. There are also stickers, ribbon and stamps! You can use the pieces stand-alone for traditional scrapbooking/paper crafting, or use the whole Simple Stories "system" which uses divided page protectors for fast, cute, hassle-free memory recording. Check out the Simple Stories website here for more information.

Now...on to the projects!

First we have 3 wedding cards (tis the season for weddings, no?!) using 100 Days of Summer paper, some Simple Stories coordinating ribbon and a couple of Unity Stamps ("Nicest Place to Be" and "Rain or Shine" ittybitty sets). Feel free to click on the following image to examine them up close and personal!


Aren't the colors in this kit yummy? Reminds me of lemonade, watermelon, blue shaved ice...SUMMER!


Next up is a "layout" using the Simple Stories divided page-protector system. The two colored blocks are a couple of the cut-apart elements that come with the kit - I used the Simple Stories/Unity banner stamps and some twine to make some cute garlands, added some photo mats and stickers and PRESTO! Easy-peasy layout waiting for pictures to slip into their pockets - no adhesive required - and I can add more journaling or multiple pictures to the pockets if I want to! I love this system!
Here's a closer look at the larger photo mat. You can see that I used some pop-dots to add a little dimension to the banner, as well as some hand stitching along the photo mat:
The last project I'd like to share with you has LOTS of parts (you wouldn't believe how much paper and kit elements I have left from this kit, even after making ALL these projects! You can literally make an entire scrapbook out of one kit and the divided page protectors!).


This is my new "Household organizer"! I used a 7 gypsies library card holder set and put together an easy place to keep goals, budgets, bills, coupons, etc. - all the little bits of paper, post-its and to-do lists that I constantly misplace!

I lined the bottom of the box with a piece of patterned paper from the 100 Days of Summer kit and used all kinds of stickers, stamps and cut-apart elements to decorate the cards inside. I laminated all pieces for durability:


Here is a peek at some of the cards:
I will be sharing more photos and information about this system on the MemoryWorks blog on July 29th -- stay tuned!


Now that you've seen my projects...keep on hoppin' to the other MemoryWorks TeamWorks participants' blogs!


Sandy (YOU ARE HERE)


Be sure to leave a comment at each stop on the Hop to earn more entries towards the Grand Prize Giveaway!


Thanks for stopping by!

Thursday, April 28, 2011

Simple Stories: Destinations BLOG HOP!

Welcome! The net is indeed a-hoppin' today while the MemoryWorks TeamWorks design team rolls out the red carpet for the new Simple Stories: Destinations line! I love the bold, classy look of this line and had a lot of fun designing with it!

I challenged myself to to take this line in two directions -- first, to "go with it" and make a layout using the line in a more expected, muted way:
The included clear overlays make it easy (and mess-free!) to add a little extra touch to a photo. Here I trimmed up a sticker from the Destinations sticker sheet and slid it under the overlay for some added color:
Pop dots and a little twine turn flat stickers into 3-D embellishments!
"Family - Our Journey Together" Layout -all materials from Simple Stories: Destinations kit, plus one piece of black cardstock

For the second layout, I decided to brighten things up and take the kit elements in a more playful direction. I borrowed a few items from the March MemoryWorks Express kit to brighten things up a little:
Again, a couple of pop dots go a long way in adding texture and dimension to stickers!
The multi-colored stickers in the Destinations kit are easy to incorporate in all kinds of layouts and color schemes:
"Play" Layout Materials Used:
*Simple Stories: Destinations paper, stickers and journaling cards
*Jenni Bowlin Studio Flag Banner stickers
*Bella Road "Table Cloth" paper
*Webster's Pages "Spring Market" paper
*twine

I put together this is a little travel journal for a design challenge on the MemoryWorks Consultant Studio message board:
This is a fun, quick project - simply cover a small notebook with paper and embellish with a couple strips of paper and a few stickers - everything you need is in the kit, already matching perfectly! Punch holes through the front and back cover, add a few eyelets to strengthen the holes, and thread a piece of ribbon through them to keep the book closed. That's all there is to it! If you're feeing particularly tricky, you can cover a few inside pages and add tabs for dividers, as I did here:
I plan to stick this little guy in the glovebox of my car to jot down little notes, memories, etc.

Travel Journal materials: twill ribbon, all other materials from Destinations kit


Be sure to check out all the other TeamWorks members Destinations projects today! A grand prize will be chosen from ALL comments left on all of the listed blogs, so be sure to leave lots of love all around- the more you comment, the better your chances of winning the prize!

Blog Hop Destinations:
  1. MemoryWorks Blog
  2. Lacey Igo
  3. Susan Nichols
  4. Danielle Hunter
  5. Sharon Hill
  6. Sheri Feypel
  7. Kelly Holbrook
  8. Sarah Crawford
  9. Sarah Jimerson
  10. Sandy Zent (YOU ARE HERE!)
  11. Simple Stories
(By the way...if you're new to "blog hopping", all you do is visit each of the above listed blogs and leave a comment in their Simple Stories: Destinations post. Have fun looking around and getting inspired!)

Thanks for stopping by!

Tuesday, April 26, 2011

Somebody is making stuff again...

There are many types of creativity, some of which I have, some of which I don't.

I "Don't":
*Paint anything more complicated than a single color at a time
*Successfully make up new recipes, although I keep trying...sorry family...
*Have much luck sewing clothing without a pattern, although, sadly, I still try
*Have the "eye" for seeing future greatness in random ugly objects unless I have a specific project in mind and find exactly what I'm looking for.

My mother-in-law, on the other hand, is very adept at all four of these things - especially the last one. MY creativity is more like - give me a defined pile of stuff and I can make something out of it or show me a picture and I'll find my own way to copy it. HER creativity is more visionary - she can go into a thrift store, craft store or garage sale and pick out cool things that need a makeover, without knowing ahead of time what she's going to do with them. When she comes up with a cool project idea, she usually has just what she needs in her stash at home somewhere. She has the EYE!

I am so jealous of this.

This weekend, I got to pick through some destined-to-be-garage-saled items at my in-laws house and picked up a couple of "projects". I told her that I wanted to make a tray with glass jars on it for my laundry room. She presented me with this:
She had found it at a thrift store somewhere and bought it because she liked the shape and thought she could make something cool out of it. Unless I already knew I was looking for a tray, I would have passed right by this thing at the first sight of those, um, interesting, um, birds. She has skills, I tell you - mad skills!

She also had these jars:
Sweet! Once I had my pile of stuff, THEN I could figure out how to be creative with it. So...in case you find an ugly tray and some cool jars and want to transform then, here is how to do it.

You need:
*A Wooden tray (look for a shape/size that works - you'll be covering everything else)
*A couple sheets of coordinating patterned cardstock
*Matching acrylic paint and brush
*ModPodge and brush
*Cutting and measuring tools
*Glass jars
*Self-adhesive vinyl and cutting tool/machine (I used a Cricut Expression)

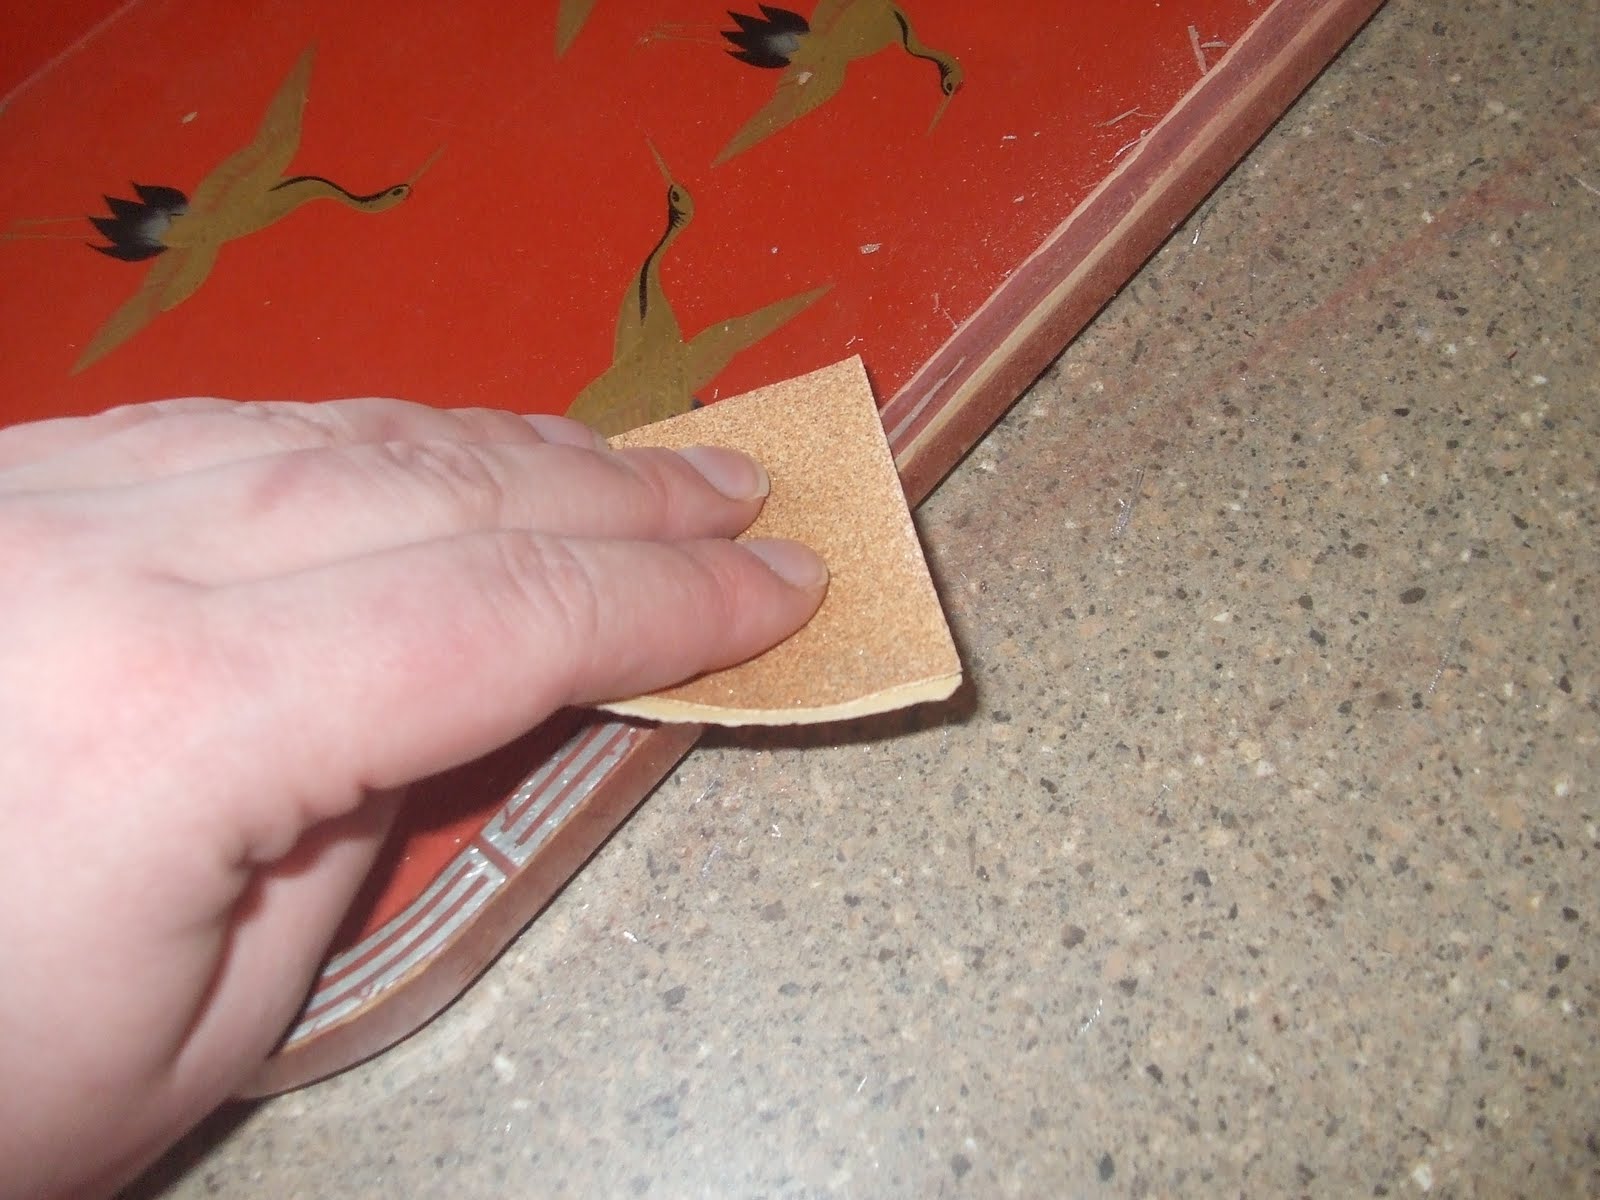
Step 1: Sand off anything that will easily come off - like gold leafing - and smooth out weird spots on the tray, perhaps turning on a Scentsy or something to mask the puzzling but unmistakable smell of vomit-laced fart coming from the tray while its being sanded (or maybe that was just MY tray...)
Step 2: Paint a couple coats of acrylic paint over the parts of the tray that may show when you're done. Marvel at your amazing paintery skills (seriously, this is as tricky as my painting gets):
Step 3: Spend several minutes testing your two rolls of black vinyl to try and figure out which one has permanent adhesive on the back and which one is repositionable. Kick yourself for not labeling them 4 months ago when the order arrived. Break out the Cricut and cut out the vinyl:
Step 4: Measure and cut your patterned paper to fit the parts of the tray where they will belong. This was a little tricky for the curved parts and I have no words of wisdom on how to do that other than, try tracing the bottom of the tray and measure carefully.

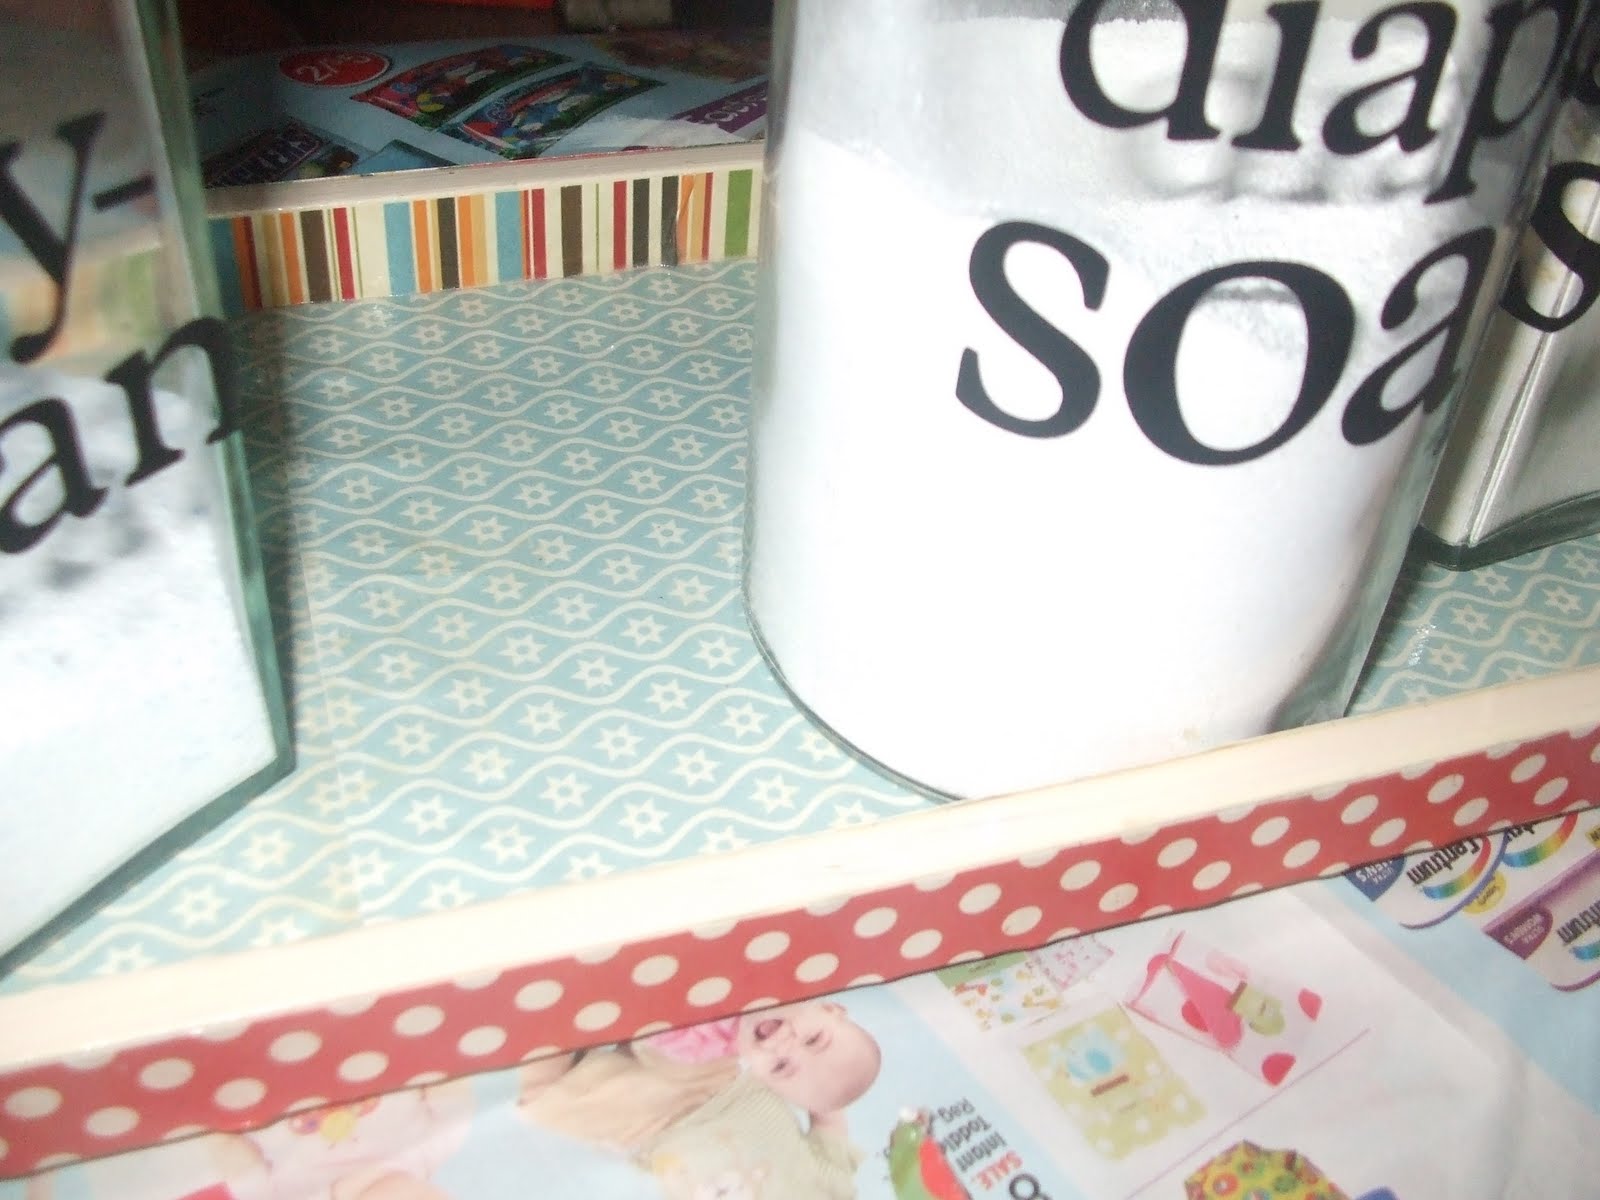
Step 5: Adhere paper to all sections of tray using ModPodge. Apply several coats to the top of the paper, allowing to dry between coats. Kick yourself for not using the "anti-bubbling trick" of coating one side of the paper with ModPodge and letting it dry and THEN adhering to the tray to avoid all the bubbles, creases and pulls you actually ended up with.
Step 6: Apply vinyl lettering to jars (which have been carefully washed with vinegar and water and dried). Fill jars with whatever you've got waiting for them:
Step 7: Decide that you have too many jars on the tray and lament the fact that you can barely see the cute patterned paper on the inside.
Step 8: Remove one jar and put it on a shelf somewhere else. Strategically place two dryer balls on the tray:
Step 9: Step back and admire your work...and then realize that your cute decoration doesn't really help the fact that the rest of the room is completely unfinished. More projects, right??

Wow - its hard to stage a cute photo for my project when there is nothing but a plain painted wall and a dusty washer and dryer. Oh well, this blog is about creating in REAL life, right?!

Now that I am healthier, have successfully birthed another baby and am starting to feel like I have energy to do more than nurse, eat, sleep and do the occasional load of laundry, I plan on doing more creating and blogging! Definitely check back on Thursday because I will be one stop on the MemoryWorks Simple Stories: Destinations Blog Hop! That means - more projects! See ya then!