Friday, March 2, 2012

The Project is well under way...

We (and I do mean a very hearty WE, as my kids are totally getting in on the action) are having a BLAST with Project Free Wardrobe!!! I have a pile of partially finished projects (because really...who wants to change the sewing machine thread more than you have to?), and a few finished ones, and a whole lotta "to be something else" clothes sitting here.

First of all, I did this sweater the other day and successfully wore it in public (the dentist's office and grocery store didn't know what hit them, let me tell you).  Unfortunately, a bunch of my latest projects have no "before" pictures to go with them. I'm ashamed to admit that my daughter had to HIDE HER CAMERA from me while she went to school, since mine is broken and I kept stealing hers. Pitiful, I know. You'll just have to imagine the transformation that took place here.

This sweater started its life as a giant 3XLT men's henley sweater - it was even too big for my husband, who is a big guy. So, I sewed new seams, cutting out all the excess, along the sides and sleeves. I cut out the henley part and serged the new neckline. then I cut off the bottom couple inches, made a band to fit my hips, and sewed it back on.  The sweater:
It's totally not perfect, but it is very, very me - I'm a neutral kinda girl, what can I say?

This is what Project Free Wardrobe has done to my kitchen table:

Whoops. Sorry, family.

Remember how I said "WE" are getting excited about this project? Well, today my second oldest, age 8, decided to try her hand at a little sewing (Santa brought her a REAL sewing machine for Christmas this year). I seriously could not be more proud - her shirt turned out DARLING!!


 Cute little "pillowcase" shirt - she even added some lace to the bottom. Didn't that turn out cute??
Of course, now that we're trying to be a little less frumpy around here, we had to accessorize her. She tried out my first attempt at an infinity scarf (free fabric from my stash):

(P.S. - my 10 year old daughter took that photo - isn't that cute? She's already had some pretty successful shots using depth of field - mama is so proud).

We HAD to do a little refashioning, too, of course, so we picked out a giant shirt from the PILE on the table - this one was so big, it may have qualified as a tent in some countries - so I just sewed up the two sides, cutting off the sleeves and taking out about 1/2 the bulk - to make a cute skirt to go with it. 5 minute project - can't beat that.

The final product:

SO CUTE, right??! And so, so free!!

Stay tuned...there are lots more projects to show you soon!!


Tuesday, February 28, 2012

Project Free Wardrobe

I must give most of the credit to my new project to Pinterest, and a whole slew of mommy-blogging/tutorial-writing/bargain fashionista types. These Pinterest-worthy bloggers make adorably cute, trendy clothes to fit their adorably cute, trendy, teensy weensy bodies. For those of us who actually LOOK like we were ever pregnant and gave birth to our brood (I have 5), this can be a little intimidating...so I decided that SOMEONE needed to pull some of these ideas together for the rest of us.Well, that and the fact that I have lost enough weight this year to need new clothes - but not enough to want to invest any money into it yet & needed a solution.

Solution: Project Free Wardrobe

This is my effort to make myself a new temporary wardrobe - for free - with as little effort as possible (because, come on - that's the way I roll!). I am also not naturally a trendy dresser - I am perfectly comfortable in a pair of jeans and a T-shirt, generally barefoot. "Clean" and "not falling off" are wardrobe wins in my book. However, I am realizing that I will get a lot more mileage out of my wardrobe - and not look as tired as I feel - if I put a little more effort into things. Therefore, I am going to try to learn a little more about how to not always LOOK like I gave birth to 5 kids and don't have any clothes that fit. I will share with you my finds and efforts!

So....here we go!

Part 1 - pants. I dug out a pair of two-sizes too big cords that I LOVED back in the post-partum period, but had marked for the reject pile. BEFORE:
(do you like the lotion fingerprints on the mirrror? thanks kids...)

 I'm sure there are more professional ways to alter pants - but this is my TEMPORARY wardrobe, and I hope to alter these again in a few weeks as I lose more weight, so this works for now! SO...all I did was turn them inside out, put them back on and mark with pins where I wanted to shrink them up (along the outside seam). I just sewed up my lines (being careful to not catch pockets, belt loops and snaps in my seam), all the way to the waistband (I'm sure if you were using heavier fabric, you'd want to remove the waistband first - I didn't really care with these...), tried them back on for fit and then serged the seam to finish it and reinforce it a little once I was happy with it. I'd forgotten how much these stretch out during the day (thanks, Old Navy), so I should have made them a titch tighter than I'd want them to end up...I will definitely be taking these in further later.

Part 2: I had some knit striped fabric I'd gotten from a "free to good home" pile at church. I started using this tutorial at Merrick's Art. See how cute she is? Let's just say my first attempt showed me that teensy, weensy mommies and tall, notsoteensy mommies probably shouldn't be wearing the same shirt. SO - I Sandyized it.

First, I added a wide band to the bottom (two layers of fabric, fits tight across hips). Then I opened up the neckline a little and added a very easy cowl neck (I will do a tutorial on this eventually - first I have to figure out how to do it without HAVING to wear a cardigan over it to hide the sticking out seam...).

Adding a cardigan from my stash (because my kids call this "the jail shirt" and because I wasn't super happy with the way the sleeves turned out...) and pinning down part of the cowl with a pin that my Mom and daughters made for me out of felt and hot glue, and whala! I may have actually created my first possibly on-trend outfit ever. If its not actually on-trend, just don't tell me...I promise its better than what I have on right now :)
 And here we go - shirt (oh yeah, I also tied a piece of leftover fabric around my hips - I'm not sure if that's a helpful addition or not, but I liked it), cardigan and newly smaller cords:
Now I just need a haircut, a camera (I am ashamed to say that I had to borrow my daughter's...) and some new shoes and I'm in business! Note: shoes don't count towards Project Free Wardrobe, since I am not going to be making my own shoes...something about size 12 shoes made out of T-shirt fabric - in the snow - just doesn't do it for me...).

So, what do you think? So far so good? Next step - cutting apart some old maternity shirts to make some non-maternity clothes. This could be awesome - or totally a disaster. I will show you either way.  :)

Anyone else want to join my project? You don't have to be much of a seamstress - if you're using clothes you were going to get rid of anyway, you have NOTHING to lose! Grab some scissors and a sewing machine (or hem tape) and get going!

Thursday, February 2, 2012

The post where I hang my head in shame and promise to do better...

Oh, my poor blog. So sad, so lonely, so neglected! I am bound and determined to get back on the blog-wagon and grow this thing this year! I have been making all kinds of things - some successful, some not - and can't wait to show you what I've been up to!

Our house is neck-deep in projects - a little hallway revamp that features some chalkboard paint, new faux-roman blinds going up in the dining room, some cool old-picture-frame stuff...there is lots going on!

Lately, I have totally fallen in love with Pinterest!! I struggle keeping track of regular bookmarks on my computer - I never remember what's what, and as a super visual person, its hard to sort through a bunch of links to find what I need. Pinterest has been a GENIUS solution for me! I can save PICTURES of what I want to look at later, and then find things easily. SIMPLIFYING MY LIFE! Yes!

Along with all the cool Pinterest-ed ideas, however, can easily come that overwhelming, "OhmygoshIcouldnevermakethat" feeling, followed by the "thathugeto-dolistmakesmefeelguilty" feeling. That's where I will come in - specializing in making things look harder than they really are is my SPECIALTY!

Watch for my upcoming "Pinteresting Knock-offs" posts to check out my take on all the cool things I find on Pinterest...and suggestions for simplifying and easily creating these ideas on your own...

Talk to you soon!!

Thursday, October 6, 2011

Life's Celebrations Blog Hop!


Welcome to Creating In Real Life! Today we'll be "blog hopping" all over the internet to check out projects made by MemoryWorks TeamWorks members using the latest Simple Stories collections!

Today I will show you a few projects made with Simple Stories Generations. This beautiful line is a mix of darker, muted colors with a touch of "antique" - perfect for a heritage album or those black-and-white family pictures! Celebrate your Family in style!

First is a layout, using some 12x12 paper, a 6x12 card and two 4x6 cards...layered with lots of stickers! I also stuck a couple of smaller journaling cards behind the photo as pull-out tags:

 Close-up of some sticker layering:
 The tags (note: I put some cardstock on the back of the right side of the heart sticker so it wouldn't stick to the tags):

Next up is a "heritage" card, made completely with patterned cardstock and stickers from the Generations line (well, plus a piece of twine..which is the perfect accent for Generations!):
Next are a couple of mini-albums, perfect for a make-and-take, stocking stuffer, teacher gift or brag book! Using 1 12x12 sheet of 2x3 journaling cards, I put 1/2 together with a binder ring for one mini, and the other half in tiny page protectors (bound matchbook style). Add a couple of stickers and a little ribbon and you're done!

Here is the Binder Ring album:

 The mini page protector/matchbook album:

Please be sure to leave comments at all of the stops on our hop today for a chance to win the Grand Prize - the more blogs you visit and comment on, the more chances you have to win!

1. MemoryWorks
2. Christy
3. Danielle
4. Jade
5. Kelly H
6. Lacey Igo
7. Lisa H
8. Sandy (YOU ARE HERE)
9. Sarah J
10. Sharon
11. Sheri
12. Shirelle
13. Susan
14. Simple Stories


Happy Hoppin'!

Thursday, July 21, 2011

Giveaway at RisC

Check out the new blog of a friend of mine -- She's a SAHM who makes super cute stuff (jewelry, hair stuff, hats, etc.) for her etsy shop and is giving away a couple of fun things this week when she gets 50 followers!

Go to RisC Handmade to enter! Good luck!

Friday, July 15, 2011

Tour my space!

Go see a tour of my "craft room" on the MemoryWorks blog today!

Thursday, July 14, 2011

Simple Stories Blog Hop! 100 Days of Summer, baby!

**Note: The Blog Hop starts officially at 10am MST...if some of the links to other blogs aren't working yet, try again then :) ***

Hello!

Welcome to my oft-neglected, but always loved, little crafting space on the web! Today I am showing you some fun projects made with the Simple Stories 100 Days of Summer scrapbooking kit, as well as a few other goodies.

Simple Stories is an AWESOME system developed by MemoryWorks founder Amber Crowell. The kits include doubled sided 12x12 paper, as well as double-sided element cards in various sizes to use for titles, photo mats, journaling blocks, etc. There are also stickers, ribbon and stamps! You can use the pieces stand-alone for traditional scrapbooking/paper crafting, or use the whole Simple Stories "system" which uses divided page protectors for fast, cute, hassle-free memory recording. Check out the Simple Stories website here for more information.

Now...on to the projects!

First we have 3 wedding cards (tis the season for weddings, no?!) using 100 Days of Summer paper, some Simple Stories coordinating ribbon and a couple of Unity Stamps ("Nicest Place to Be" and "Rain or Shine" ittybitty sets). Feel free to click on the following image to examine them up close and personal!


Aren't the colors in this kit yummy? Reminds me of lemonade, watermelon, blue shaved ice...SUMMER!


Next up is a "layout" using the Simple Stories divided page-protector system. The two colored blocks are a couple of the cut-apart elements that come with the kit - I used the Simple Stories/Unity banner stamps and some twine to make some cute garlands, added some photo mats and stickers and PRESTO! Easy-peasy layout waiting for pictures to slip into their pockets - no adhesive required - and I can add more journaling or multiple pictures to the pockets if I want to! I love this system!
Here's a closer look at the larger photo mat. You can see that I used some pop-dots to add a little dimension to the banner, as well as some hand stitching along the photo mat:
The last project I'd like to share with you has LOTS of parts (you wouldn't believe how much paper and kit elements I have left from this kit, even after making ALL these projects! You can literally make an entire scrapbook out of one kit and the divided page protectors!).


This is my new "Household organizer"! I used a 7 gypsies library card holder set and put together an easy place to keep goals, budgets, bills, coupons, etc. - all the little bits of paper, post-its and to-do lists that I constantly misplace!

I lined the bottom of the box with a piece of patterned paper from the 100 Days of Summer kit and used all kinds of stickers, stamps and cut-apart elements to decorate the cards inside. I laminated all pieces for durability:


Here is a peek at some of the cards:
I will be sharing more photos and information about this system on the MemoryWorks blog on July 29th -- stay tuned!


Now that you've seen my projects...keep on hoppin' to the other MemoryWorks TeamWorks participants' blogs!


Sandy (YOU ARE HERE)


Be sure to leave a comment at each stop on the Hop to earn more entries towards the Grand Prize Giveaway!


Thanks for stopping by!

Thursday, April 28, 2011

Simple Stories: Destinations BLOG HOP!

Welcome! The net is indeed a-hoppin' today while the MemoryWorks TeamWorks design team rolls out the red carpet for the new Simple Stories: Destinations line! I love the bold, classy look of this line and had a lot of fun designing with it!

I challenged myself to to take this line in two directions -- first, to "go with it" and make a layout using the line in a more expected, muted way:
The included clear overlays make it easy (and mess-free!) to add a little extra touch to a photo. Here I trimmed up a sticker from the Destinations sticker sheet and slid it under the overlay for some added color:
Pop dots and a little twine turn flat stickers into 3-D embellishments!
"Family - Our Journey Together" Layout -all materials from Simple Stories: Destinations kit, plus one piece of black cardstock

For the second layout, I decided to brighten things up and take the kit elements in a more playful direction. I borrowed a few items from the March MemoryWorks Express kit to brighten things up a little:
Again, a couple of pop dots go a long way in adding texture and dimension to stickers!
The multi-colored stickers in the Destinations kit are easy to incorporate in all kinds of layouts and color schemes:
"Play" Layout Materials Used:
*Simple Stories: Destinations paper, stickers and journaling cards
*Jenni Bowlin Studio Flag Banner stickers
*Bella Road "Table Cloth" paper
*Webster's Pages "Spring Market" paper
*twine

I put together this is a little travel journal for a design challenge on the MemoryWorks Consultant Studio message board:
This is a fun, quick project - simply cover a small notebook with paper and embellish with a couple strips of paper and a few stickers - everything you need is in the kit, already matching perfectly! Punch holes through the front and back cover, add a few eyelets to strengthen the holes, and thread a piece of ribbon through them to keep the book closed. That's all there is to it! If you're feeing particularly tricky, you can cover a few inside pages and add tabs for dividers, as I did here:
I plan to stick this little guy in the glovebox of my car to jot down little notes, memories, etc.

Travel Journal materials: twill ribbon, all other materials from Destinations kit


Be sure to check out all the other TeamWorks members Destinations projects today! A grand prize will be chosen from ALL comments left on all of the listed blogs, so be sure to leave lots of love all around- the more you comment, the better your chances of winning the prize!

Blog Hop Destinations:
  1. MemoryWorks Blog
  2. Lacey Igo
  3. Susan Nichols
  4. Danielle Hunter
  5. Sharon Hill
  6. Sheri Feypel
  7. Kelly Holbrook
  8. Sarah Crawford
  9. Sarah Jimerson
  10. Sandy Zent (YOU ARE HERE!)
  11. Simple Stories
(By the way...if you're new to "blog hopping", all you do is visit each of the above listed blogs and leave a comment in their Simple Stories: Destinations post. Have fun looking around and getting inspired!)

Thanks for stopping by!

Tuesday, April 26, 2011

Somebody is making stuff again...

There are many types of creativity, some of which I have, some of which I don't.

I "Don't":
*Paint anything more complicated than a single color at a time
*Successfully make up new recipes, although I keep trying...sorry family...
*Have much luck sewing clothing without a pattern, although, sadly, I still try
*Have the "eye" for seeing future greatness in random ugly objects unless I have a specific project in mind and find exactly what I'm looking for.

My mother-in-law, on the other hand, is very adept at all four of these things - especially the last one. MY creativity is more like - give me a defined pile of stuff and I can make something out of it or show me a picture and I'll find my own way to copy it. HER creativity is more visionary - she can go into a thrift store, craft store or garage sale and pick out cool things that need a makeover, without knowing ahead of time what she's going to do with them. When she comes up with a cool project idea, she usually has just what she needs in her stash at home somewhere. She has the EYE!

I am so jealous of this.

This weekend, I got to pick through some destined-to-be-garage-saled items at my in-laws house and picked up a couple of "projects". I told her that I wanted to make a tray with glass jars on it for my laundry room. She presented me with this:
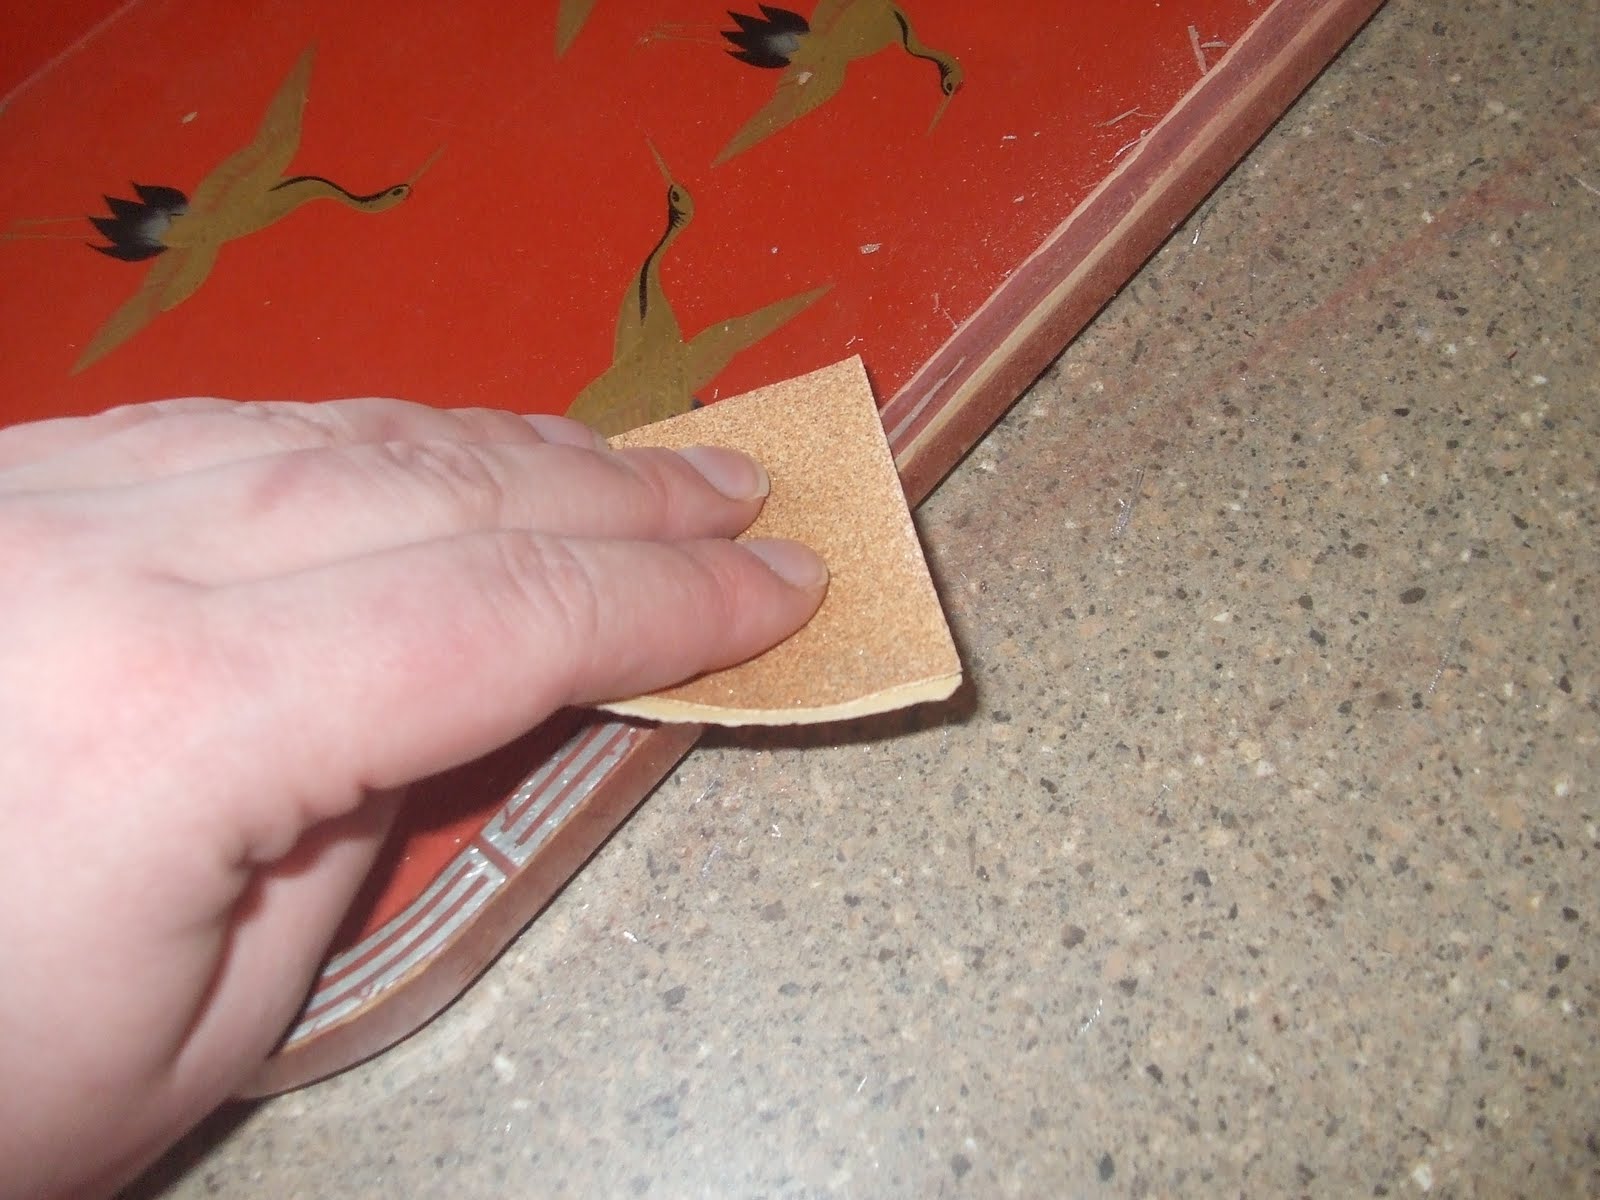
She had found it at a thrift store somewhere and bought it because she liked the shape and thought she could make something cool out of it. Unless I already knew I was looking for a tray, I would have passed right by this thing at the first sight of those, um, interesting, um, birds. She has skills, I tell you - mad skills!

She also had these jars:
Sweet! Once I had my pile of stuff, THEN I could figure out how to be creative with it. So...in case you find an ugly tray and some cool jars and want to transform then, here is how to do it.

You need:
*A Wooden tray (look for a shape/size that works - you'll be covering everything else)
*A couple sheets of coordinating patterned cardstock
*Matching acrylic paint and brush
*ModPodge and brush
*Cutting and measuring tools
*Glass jars
*Self-adhesive vinyl and cutting tool/machine (I used a Cricut Expression)

Step 1: Sand off anything that will easily come off - like gold leafing - and smooth out weird spots on the tray, perhaps turning on a Scentsy or something to mask the puzzling but unmistakable smell of vomit-laced fart coming from the tray while its being sanded (or maybe that was just MY tray...)
Step 2: Paint a couple coats of acrylic paint over the parts of the tray that may show when you're done. Marvel at your amazing paintery skills (seriously, this is as tricky as my painting gets):
Step 3: Spend several minutes testing your two rolls of black vinyl to try and figure out which one has permanent adhesive on the back and which one is repositionable. Kick yourself for not labeling them 4 months ago when the order arrived. Break out the Cricut and cut out the vinyl:
Step 4: Measure and cut your patterned paper to fit the parts of the tray where they will belong. This was a little tricky for the curved parts and I have no words of wisdom on how to do that other than, try tracing the bottom of the tray and measure carefully.

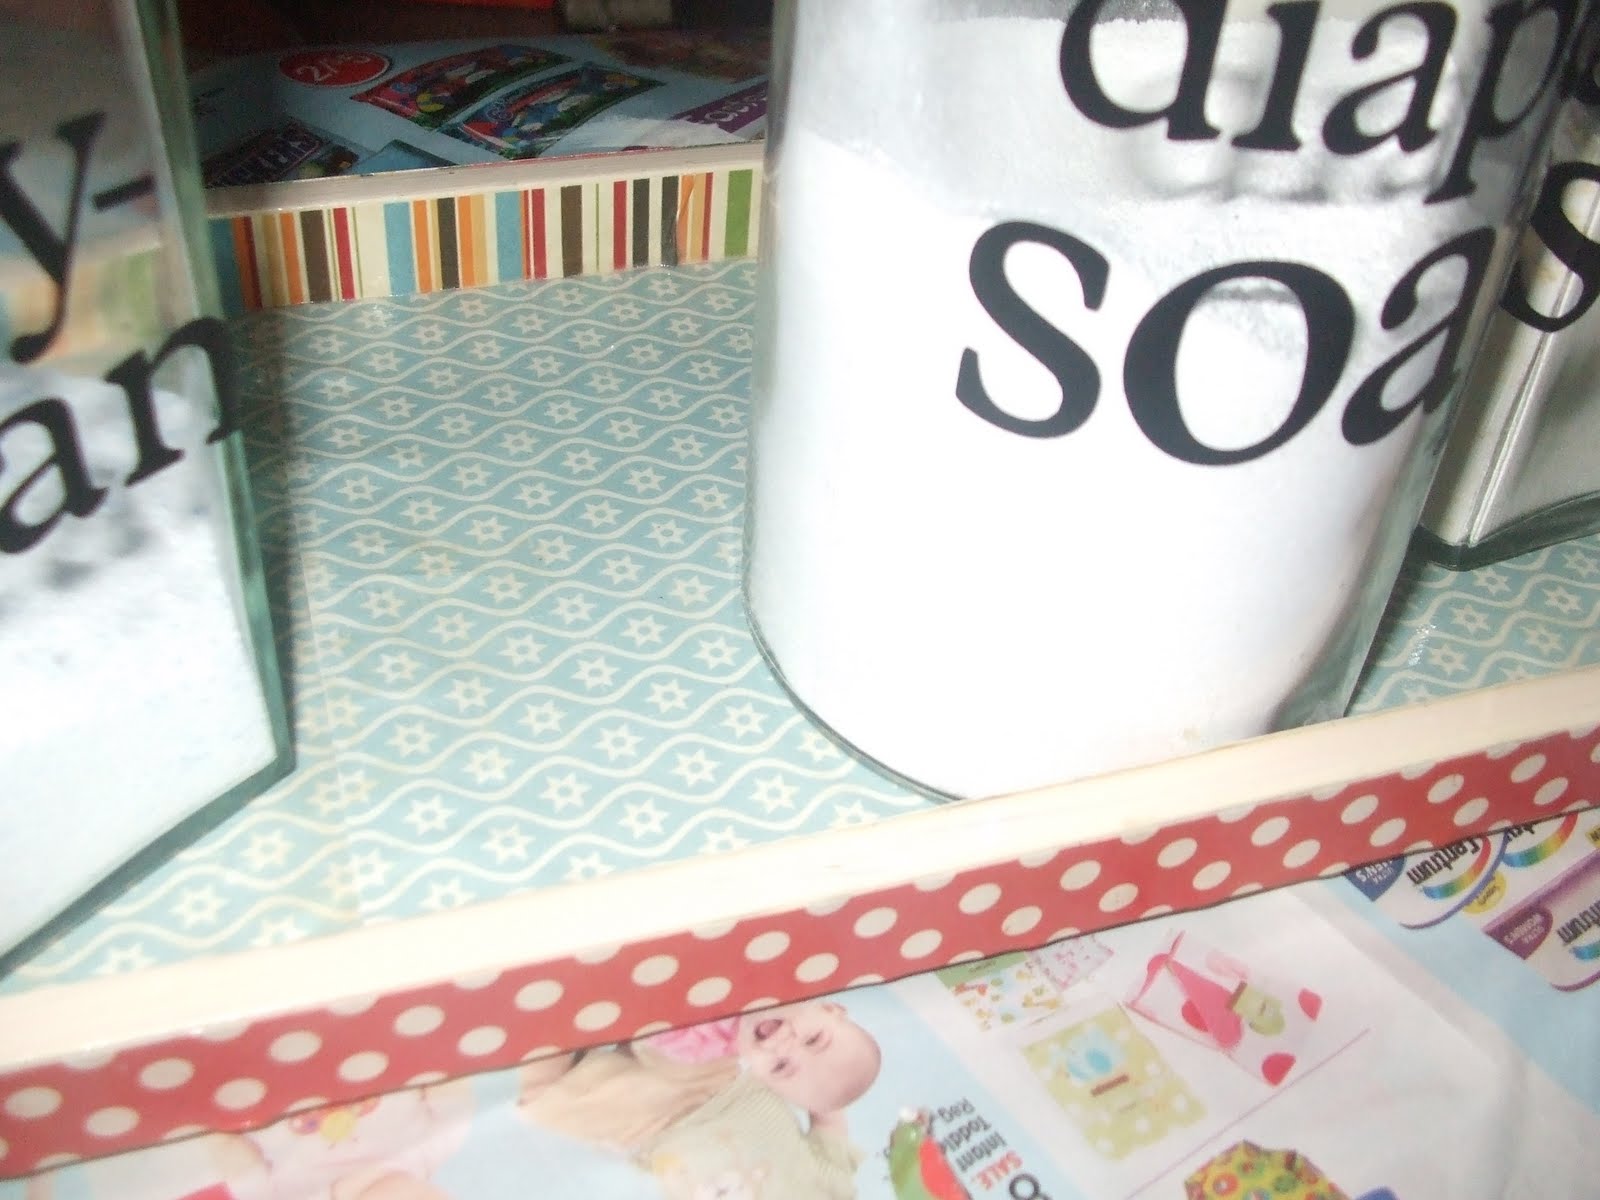
Step 5: Adhere paper to all sections of tray using ModPodge. Apply several coats to the top of the paper, allowing to dry between coats. Kick yourself for not using the "anti-bubbling trick" of coating one side of the paper with ModPodge and letting it dry and THEN adhering to the tray to avoid all the bubbles, creases and pulls you actually ended up with.
Step 6: Apply vinyl lettering to jars (which have been carefully washed with vinegar and water and dried). Fill jars with whatever you've got waiting for them:
Step 7: Decide that you have too many jars on the tray and lament the fact that you can barely see the cute patterned paper on the inside.
Step 8: Remove one jar and put it on a shelf somewhere else. Strategically place two dryer balls on the tray:
Step 9: Step back and admire your work...and then realize that your cute decoration doesn't really help the fact that the rest of the room is completely unfinished. More projects, right??

Wow - its hard to stage a cute photo for my project when there is nothing but a plain painted wall and a dusty washer and dryer. Oh well, this blog is about creating in REAL life, right?!

Now that I am healthier, have successfully birthed another baby and am starting to feel like I have energy to do more than nurse, eat, sleep and do the occasional load of laundry, I plan on doing more creating and blogging! Definitely check back on Thursday because I will be one stop on the MemoryWorks Simple Stories: Destinations Blog Hop! That means - more projects! See ya then!

Friday, September 24, 2010

Summer layouts

Check out a couple of fun summer layouts by yours truly on the MemoryWorks blog today!

Thank you to everyone who participated in the MW blog hop last week...and for all your kind comments!

Tuesday, September 14, 2010

Welcome Blog Hoppers!

Today the MemoryWorks team is celebrating MemoryWorks newest, exclusive Simple Stories line - ele.ment.ary! Ironically it's Back To School night in our town tonight, so I guess I am now in the mood for some school products and projects!

Make sure you start the blog hop at http://www.memoryworksblog.blogspot.com/ for complete rules and the list of ALL the blogs to visit today...you must visit and comment on EACH of these blogs to be eligible for prizes today - good luck!

If you are unfamiliar with the Simple Stories system, take a look here. Simple Stories is a quick, easy and innovative way to get your photos scrapbooked without stress...and still have your scrapbooks look spectacular, regardless of your skill level!

The Simple Stories lines are also GREAT for traditional scrapbook pages as well...in fact, I combine the two strategies in my scrapbooks.

Here are a couple of cards made from ele.ment.ary elements:
(the following card is what I call a "lunchbox mini"...using the same basic design as the above card)
Here is a traditional, non-school-themed layout using the ele.ment.ary elements and paper:
The following layouts are pages that will go in my daughter's K-12 school album. I plan on purchasing an album, ele.ment.ary kit and divided page protectors for each of my children and pre-making their school albums. As the years go by, I can just slip in the appropriate pictures - the work will already be done! For once I'll have a set of albums that I'm not BEHIND on! :)

My plan is to have a "summary" page in the front of each album highlighting wallet-sized pictures from each grade K-12:

Then each grade will have a "title page" with a large school photo on the front:

Behind each of these, will be the divided page protectors - one set for each grade. All I have to do is slip important pictures in the slots, perhaps with a journaling card or two...and I'm done! Couldn't be easier! You can check out some of the layouts I created with the first Simple Stories system (Life Documented) in the divided page protectors HERE (scroll down a bit - they're towards the bottom of the post).

I hope after checking out all these blogs today, that you'll be inspired to check out the Simple Stories system for yourself! You won't be disappointed! If you're interested in more information about the Simple Stories line, or wish to purchase it yourself...those who already know me can order on my website or you can find your local MemoryWorks consultant HERE.

NEXT ON YOUR BLOG HOP LIST: Go visit Mary at http://thecareerscrapper.blogspot.com

Don't forget to leave comments at each blog you visit to qualify for prizes! Thanks for stopping by!