Showing posts with label repurposed materials. Show all posts

Tuesday, April 26, 2011

Somebody is making stuff again...

There are many types of creativity, some of which I have, some of which I don't.

I "Don't":
*Paint anything more complicated than a single color at a time
*Successfully make up new recipes, although I keep trying...sorry family...
*Have much luck sewing clothing without a pattern, although, sadly, I still try
*Have the "eye" for seeing future greatness in random ugly objects unless I have a specific project in mind and find exactly what I'm looking for.

My mother-in-law, on the other hand, is very adept at all four of these things - especially the last one. MY creativity is more like - give me a defined pile of stuff and I can make something out of it or show me a picture and I'll find my own way to copy it. HER creativity is more visionary - she can go into a thrift store, craft store or garage sale and pick out cool things that need a makeover, without knowing ahead of time what she's going to do with them. When she comes up with a cool project idea, she usually has just what she needs in her stash at home somewhere. She has the EYE!

I am so jealous of this.

This weekend, I got to pick through some destined-to-be-garage-saled items at my in-laws house and picked up a couple of "projects". I told her that I wanted to make a tray with glass jars on it for my laundry room. She presented me with this:
She had found it at a thrift store somewhere and bought it because she liked the shape and thought she could make something cool out of it. Unless I already knew I was looking for a tray, I would have passed right by this thing at the first sight of those, um, interesting, um, birds. She has skills, I tell you - mad skills!

She also had these jars:
Sweet! Once I had my pile of stuff, THEN I could figure out how to be creative with it. So...in case you find an ugly tray and some cool jars and want to transform then, here is how to do it.

You need:
*A Wooden tray (look for a shape/size that works - you'll be covering everything else)
*A couple sheets of coordinating patterned cardstock
*Matching acrylic paint and brush
*ModPodge and brush
*Cutting and measuring tools
*Glass jars
*Self-adhesive vinyl and cutting tool/machine (I used a Cricut Expression)

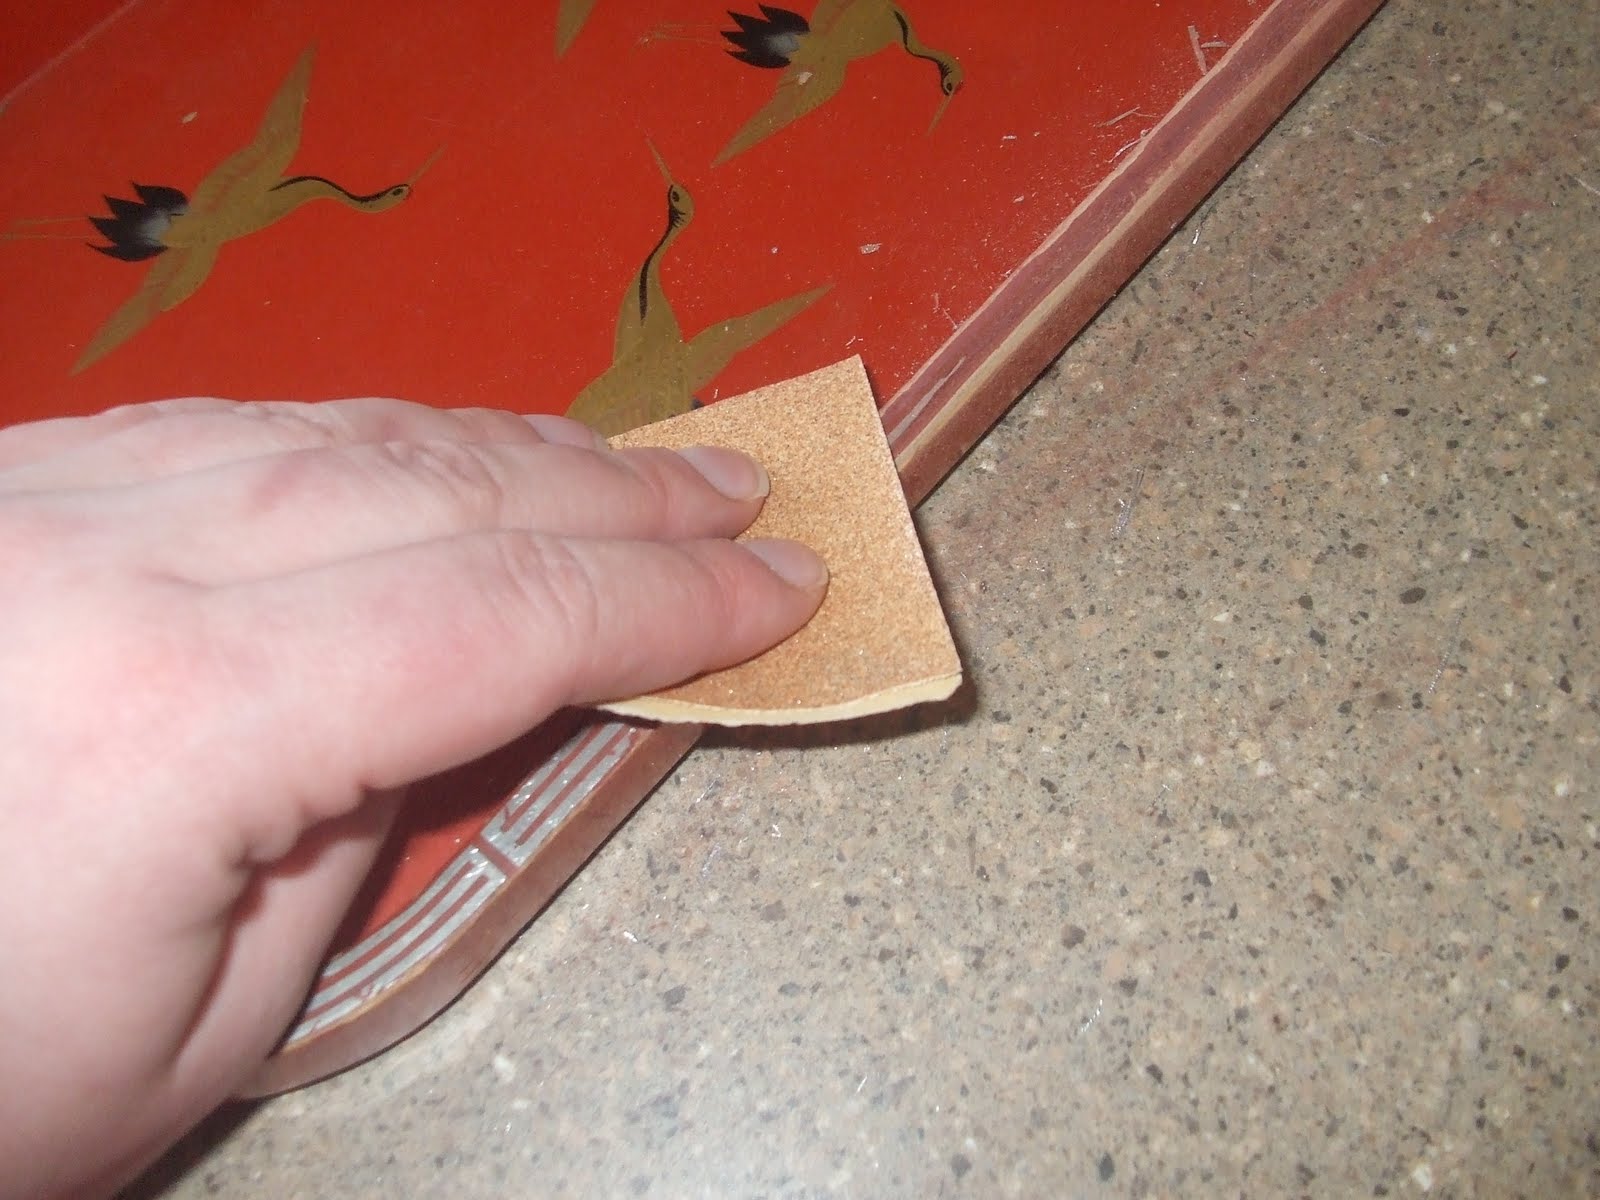
Step 1: Sand off anything that will easily come off - like gold leafing - and smooth out weird spots on the tray, perhaps turning on a Scentsy or something to mask the puzzling but unmistakable smell of vomit-laced fart coming from the tray while its being sanded (or maybe that was just MY tray...)
Step 2: Paint a couple coats of acrylic paint over the parts of the tray that may show when you're done. Marvel at your amazing paintery skills (seriously, this is as tricky as my painting gets):
Step 3: Spend several minutes testing your two rolls of black vinyl to try and figure out which one has permanent adhesive on the back and which one is repositionable. Kick yourself for not labeling them 4 months ago when the order arrived. Break out the Cricut and cut out the vinyl:
Step 4: Measure and cut your patterned paper to fit the parts of the tray where they will belong. This was a little tricky for the curved parts and I have no words of wisdom on how to do that other than, try tracing the bottom of the tray and measure carefully.
Step 5: Adhere paper to all sections of tray using ModPodge. Apply several coats to the top of the paper, allowing to dry between coats. Kick yourself for not using the "anti-bubbling trick" of coating one side of the paper with ModPodge and letting it dry and THEN adhering to the tray to avoid all the bubbles, creases and pulls you actually ended up with.
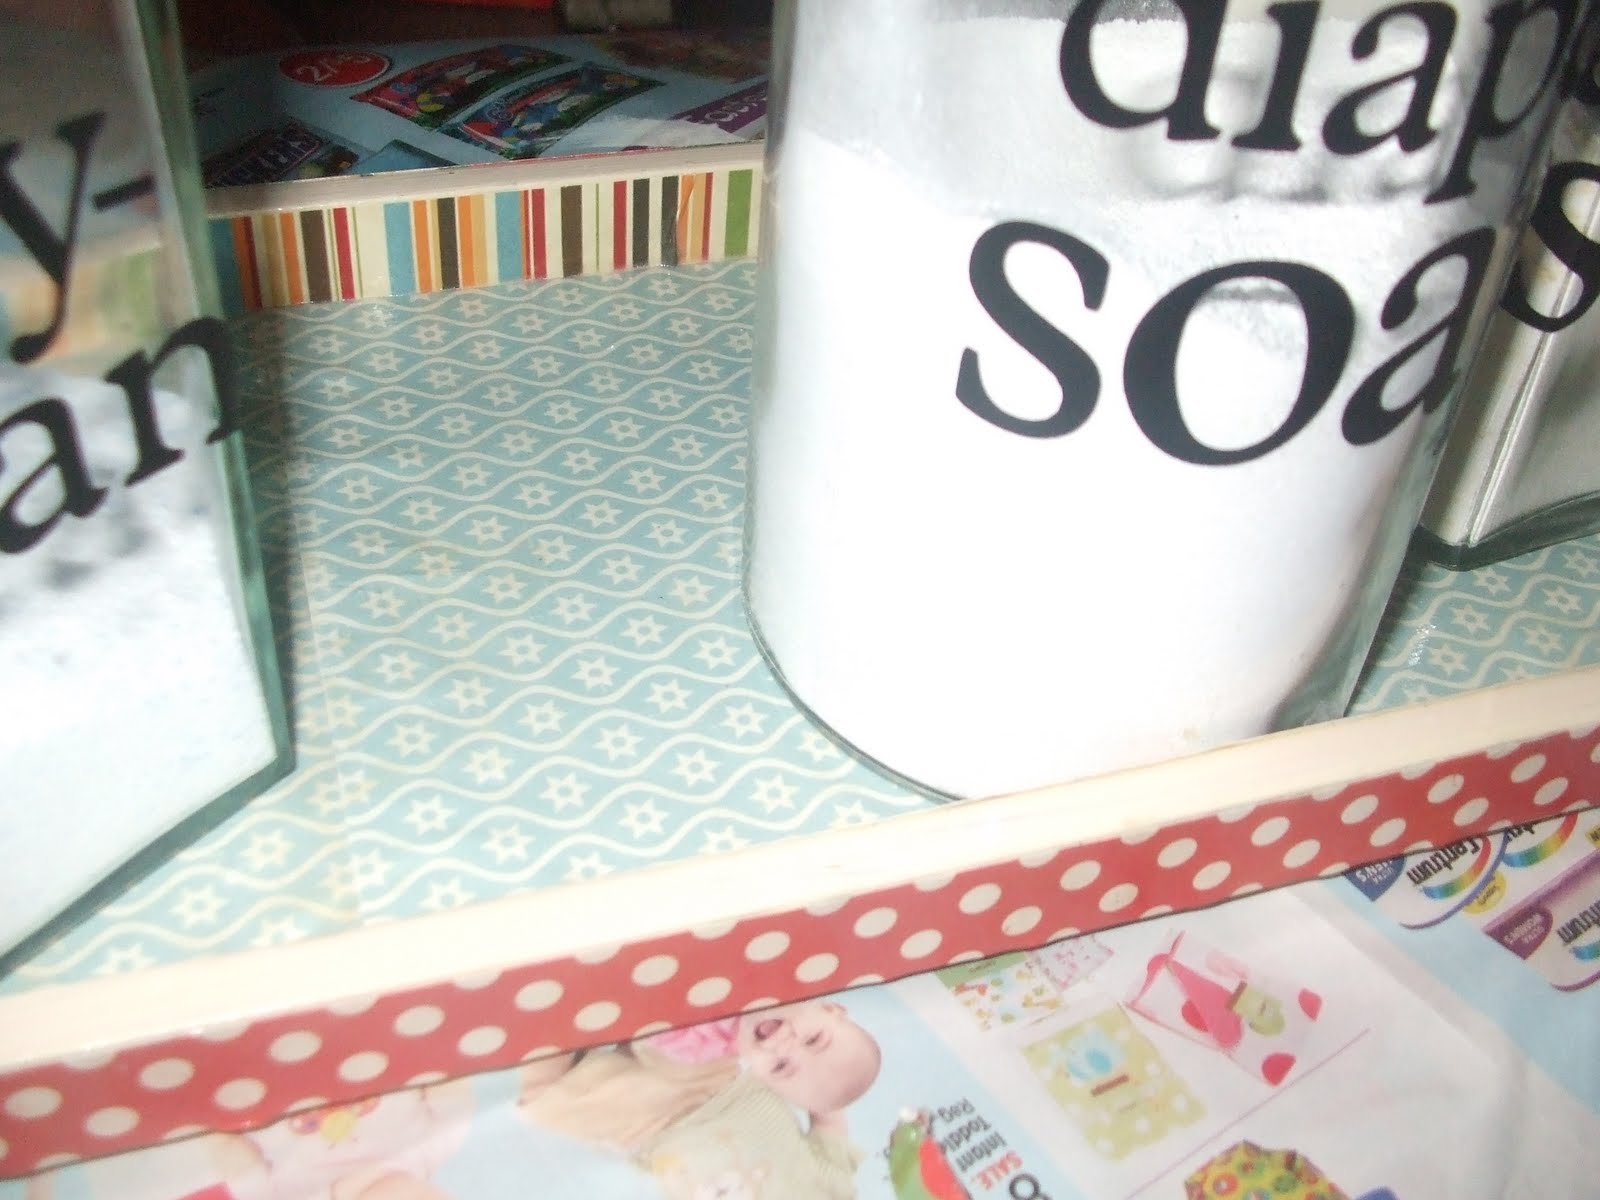
Step 6: Apply vinyl lettering to jars (which have been carefully washed with vinegar and water and dried). Fill jars with whatever you've got waiting for them:
Step 7: Decide that you have too many jars on the tray and lament the fact that you can barely see the cute patterned paper on the inside.
Step 8: Remove one jar and put it on a shelf somewhere else. Strategically place two dryer balls on the tray:
Step 9: Step back and admire your work...and then realize that your cute decoration doesn't really help the fact that the rest of the room is completely unfinished. More projects, right??

Wow - its hard to stage a cute photo for my project when there is nothing but a plain painted wall and a dusty washer and dryer. Oh well, this blog is about creating in REAL life, right?!

Now that I am healthier, have successfully birthed another baby and am starting to feel like I have energy to do more than nurse, eat, sleep and do the occasional load of laundry, I plan on doing more creating and blogging! Definitely check back on Thursday because I will be one stop on the MemoryWorks Simple Stories: Destinations Blog Hop! That means - more projects! See ya then!

Tuesday, February 16, 2010

Help save the planet AND look like a Super Mom, all with one easy project!

Anyone out there need a Super Mom project? You know...the type that::

a.)you can finish in one sitting (eliminating Project-Starter-Never-Finisher Guilt),
b.) Uses up project scraps or recycled materials so you can feel like a Stick-to-it-Budgeter,
c.) Helps throw a little something at the "Good intentions in my mind don't help the planet" guilt, and
d.) Can make you look like a snazzy, trendy, with-it green parent to all those who don't know it only took you 30 minutes to whip you the project?

Yeah? You're in? Well, here you go --
Washable sandwich and snack bags! (Homemade bread and non-homemade banana chips optional...but if you pack your cute bags with some sort of homemade item...you get double points in the "cool" department!)

Now I absolutely did NOT make this idea up. Lots of people make them. Lots of people sell them. Lots of people make and sell much cuter, much more finished-looking bags than mine. But my method is ridiculously fast and does the job - so I'm opting for that.

You can make these out of whatever you want - I used quilting fabric (from my slowly shrinking fat quarter stash) for the outsides (but wouldn't some fabric from old jeans or something be cool?) and some leftover ProCare fabric from my diaper-making stash. You absolutely don't have to use waterproof fabric like ProCare or PUL for your lining, but it is helpful if you have children like mine who love to add things to their lunches like honey sandwiches and washed but not dried carrot sticks. I will justify the use of this non-organic, probably non-biodegradable manmade plastic fabric by saying that if I didn't use it, I would end up doing a lot more backpack and diaperbag washing....

I used Ziploc bags (sandwich size and snack size) as a pattern - just cut them open, lay them flat and trace on your fabric. Once you get comfy with that, you can start making bags any size you want, based on what scraps you have.

For each bag you need a piece of outer fabric and a piece of liner fabric, cut to the same size. Make sure your piece are big enough to fold in half to become the bag! You also need a piece of velcro/hook-and-loop that is the same width as your fabric. I cut my 1 1/2" diaper velcro in half to make 3/4" wide velcro...but I could have gone even narrower with the same results.

FIRST...put your outer and liner fabrics, right sides together, and sew across the two ends (serger or sewing machine) that will become the top of the bag:
You will end up with a tube that looks like this:
Flip your tube inside-out (so right sides are now showing) and finger press the seam down. You can iron it if you're a perfectionist, but DON'T iron it if you're using PUL or ProCare. Direct heat on plastic...you get the idea. On the LINING side, sew your piece of the hook side of the velcro along one seam, flip to the other end and sew the loop side of the velcro along the other seam (LINING side). Sew all around the 4 sides of each piece of velcro, making sure that the velcro goes all the way to the end of the fabric.

I guess you could just put small pieces of velcro in the centers instead of all the way across, but I'd prefer my snack items to not leak crumbs everywhere, so I want that velcro sewn all the way across and into the seams!

Next, line up your hook and loop ends and seal it shut:
Now, starting at the velcro end, just serge all your sides shut (or zig-zag if you don't have a serger...which you really should start looking for sales at WalMart for, because you can sew things very fast and furiously with a serger!). I sewed mine in a chain, so I didn't have to break to cut threads:
Cut all the excess thread off and get all the bags looking all trimmed and nice. The last thing to do is take each bag and sew a couple reinforcing stitches at the top (just above the velcro) so if your kids yank open the bags, they won't eventually rip open the seams. I broke 2 needles on this step before I switched to a denim needle...so I'd recommend that you switch to a denim needle to sew through all those layers:)
I made all these bags in an afternoon, which included stopping to feed children, put a baby down for a nap, do laundry, make a phone call, etc....but had I not been interrupted, once the pieces are all cut out, the sewing is very, very quick. If you only made ONE bag, it would literally take you 20 minutes - including threading sewing machines, cutting fabric, etc.
We are LOVING these bags so far, other than the fact that they are a little noisy to open in church...it helped to open the bag, then fold the velcro down so the baby couldn't keep shutting it and re-opening it (cuz that's fun!)...but I may need to figure out some sort of zipper/magnet/drawstring bag or something JUST for quiet places. Any ideas??

I figured that all 24 bags I made probably cost me the same as 2 boxes of ziplocs (if I had gone out and bought all the supplies...MUCH cheaper if you use leftover stuff or recycle other fabric)- but we can keep reusing them until they fall apart, and every time you pull one out, you can think, "Dang, I'm awesome! Look how cute this is!"

Now go sew...the planet wants you to :)

Friday, August 28, 2009

Quick and Easy Bulletin Board

I posted a simple but fun bulletin board idea over at the MemoryWorks blog today - check it out:

Message Board, Jr.

Oh, and if you go down a few entries to last Friday's, you'll find a more grown-up and very cool version of a message board by my friend Lacey!

Repurposed Weird Baby Jeans + Moda Charm Pack = Quick, Cute, TOTALLY Do-able!

Everybody ready for a tutorial?? This is one of my favorite projects of the summer! It turned out really cute, was incredibly cheap (we're talking like $2-3 for the entire outfit, folks!), is fast to make...and is VERY "operator error"-friendly!

Here we go: Cute, huh?!

This is what you need to decorate your baby in such chic cuteness:

*A onesie or T-shirt (you probably have one at home you can use...so that would be FREE, my friends!)

*An awkward pair of thrift-store pants. This particular pair has unusually short legs compared to the size of the waist...and denim sweatpant capris are never flattering, right?! (Awkward thrift-store pants: FREE to me, but if you went out and bought them...like $1-2, right?)

*10 squares from a Moda charm-pack (5" squares if you're cutting your own). I used "Objects of Desire".

*Sewing machine, serger is helpful, thread, rotary cutter, scissors, embroidery floss/needle


First, lop off the pant legs. You can make them shorts:


Or cut a little higher and make a skirt, like I did:

Lay out your outfit so you know what you're doing and what fabric you want next to what:

Cut your charm squares in half - put one stack aside, you only need half of the halves. I can't really tell you how many total squares you'll need, because your cut-up pants might be a different size than mine...I think I used 10 or so - you need enough to go around the base of your skirt about 1 1/2 times (you'll be gathering):


Sew all the charm square halves in a long strip like so:

Cut down the center, lengthwise, of the strip with a rotary cutter:

Sew the ends of the strips together to make a circle:


Two things to do here -- 1.) serge all around along the bottom edge of your circle (or zigzag or whatever you want to do to finish it) and 2.) machine baste around the top edge:

Pull the machine-basting-thread to gather into a ruffle:

Adjust the basting so that the ruffle fits the bottom of your skirt and is fairly evenly gathered. Pin to the INSIDE of the skirt, sticking out as shown:

Sew 1/4" or so along the bottom edge of the skirt to attach the ruffle. Leave the edge of the denim part "raw" as shown:


Remember those awkward pant legs you lopped off? Cut a few strips from them and attach a few around the waistband for some funky belt loops (leave edges raw):

Here's what we have now:


Now, go throw it in the washing machine, get it good and wet -and then throw it in the dryer. All those raw edges will get nice and frayed! Then find a long, cute ribbon to thread through the belt loops for a belt.


If you want to make a matching shirt (and I stole this idea from my friend JILL, who stole it from our friend TRISH)...stick a charm square under the top layer of the shirt and using embroidery floss and a needle, stitch a shape over the top of it. Then use some sharp scissors and cut out the T-shirt area inside the shape to let the charm square show through.


Do NOT do this, which I did:


I tried to cut the hole before doing the stitching. This was not a great idea, it was not fun, and it turned out weird. Still cute, but weird. I should really have clarified the directions before I tried it :)


When you're all done, you'll have yourself one sweet little outfit...AND you can be all impressed with yourself for "recycling"!

Saturday, May 9, 2009

MemoryWorks May Express Kit

The May Express kit from MemoryWorks was so fun to work with - the papers and embellishments reminded me of 80's cartoons - Rainbow Brite, CareBears, Smurfs... you get the idea! So here's to first grade!


This one is my favorite - I sewed 2 layers of a Prima layered fabric flower together with a button on top, made 2 leaves out of some scrap fabric (sewing and scrapbooking coming together! Ah! The awesomeness! The awesomeness!), and sewed all of it to the center of a long ribbon. Tie around baby's head - instant boutique chic! More pictures of this on the MemoryWorks blog


The mat for the cupcake in this one is actually one of the layers of the same Prima flower I used on the baby headband:

(I don't know if I'm getting lazier or getting smarter...but lately my layouts have been really simple...)

The above headband accessorized by the cutest baby in the universe:

The inside of this card says, "I hope the apple doesn't fall far from the tree, because you're a great Mom!"
I hope everyone has a spectacular Mother's Day...I'm off to do more laundry so I can take the day OFF tomorrow!

Tuesday, March 31, 2009

Who says baby toys can't look CUTE scattered all over your floor??

I have been so ridiculously busy the past few weeks...I have squeezed in some sewing and paper crafting time, but haven't had time to post any of it! I still have more aprons to show you, but I haven't felt like putting the tutorial together yet, so I guess you'll have to wait (I know, its killing you). But, I'll give you a hint...for one of them you're going to need 2 fat quarters and a pack of hem facing tape (not sure if that's really what its called...I should probably find that out) OR 3 fat quarters.

Instead, I thought I'd show you my latest I {HEART} MODA project. I ordered the Neptune charm pack a few weeks ago (this fabric is SO cute - way brighter, cuter and better than it looks on the computer!) and wasn't quite sure what to do with it... so while trolling etsy the other night, I found a great idea for fabric blocks for my baby!


I thought I was so clever adding ribbon loops and sticking a rattle (rudely cut out of a not-so-hot-looking-anymore toy from one of my other kids) inside...then found today that lots of other people already are doing that...oh, well!


I was determined to come up with my own spectacularly creative addition to the basic idea, so after watching my 3 1/2 month old try to play with the first block I made (which was WAY too big for her, by the way...my clever "idea" of making 3 different sizes was really me trying to find the right size for her), continually dropping it...and not quite coordinated enough yet to pick it back up...


I added an elastic LOOP on a ribbon (a short ribbon so she won't wrap it around herself and choke on it) so that I can slip it on her wrist. That way, if she drops it - hurray! - its already attached to her hand! Aren't I clever? (if you see anyone else who already did this, please don't tell me...just let me live in ignorance on this one).
I'm thinking about trying to make some different shapes. I still have about half the charm pack left, so I...I mean she...could have a whole basket of coordinated squishy toys in a basket in the living room. As kid #4, most of the baby toys are looking pretty sad, AND I don't like having "piles" of random things around the living room now that I no longer live in a teeny apartment. My solution is to make some new toys (using the usable parts of the old toys) that actually look CUTE sitting around the living room. Saves me some money, gives the illusion of organization - win-win situation!

Monday, March 2, 2009

Apron #2: 15 Minute Dishtowel Apron

This one is so easy its ridiculous...I mean, seriously...as long as you know how to operate a sewing machine and are allowed to handle sharp objects by yourself...you can make this in 15 minutes!

You need: 1 large dish/tea towel and a long piece of sturdy ribbon that won't fray easily (I used about 2 yards - measure the ribbon right on your kid, as it needs to be long enough to go around their neck, down their sides and tie in the back

Hold the towel up to your kid, centering it on their chest and holding it at about the level it should sit when finished. Use a pin to mark about an inch in from their armpit, and another to mark their waist level (if you mark a bit lower than their current waist area, the apron should still fit as they get a bit taller!).

Fold the towel in half, lengthwise, and using a rotary cutter (or scissors), cut from pin to pin, making a curved cut (don't worry - you'll be able to eye ball it, but if you're totally chicken, draw the line or use pins to mark where you want to cut):
When you open it out, it'll look like this (see? it already looks like an apron!):


If you have a serger, serge the raw curved edges, otherwise use a zigzag stitch along the raw edges:

Then fold it over (on the backside of your towel) about an inch and sew along the serged edge (you're making a channel to thread the ribbon through, so make sure you don't sew the ends shut!). I let my kids help me "sew" this part:

This is what you'll end up with on both sides:

Hook a safety pin to one end of your ribbon. Thread it up through the side channel on one side, around the top and back down through the other side:

Put the apron on your kid and adjust the ribbon so that the ties are equal length and the neck part fits. When you have it how you want it, sew a few stitches by hand through one of the top corners, tacking down the ribbon on one side only. This way you'll still be able to adjust the neck opening, but the whole ribbon won't get pulled out of wack every time your kid takes it on and off.

If you're feeling particularly tricky (and the back of the dishtowel isn't ugly), you can fold up the towel from the bottom and sew up the edges to make a pocket. Then sew straight vertical lines from the fold to the top of the pocket to make smaller pockets:

All done!

Tip: To keep the ribbons from getting pulled out of the channels, you can tie a large bead (like those big wooden ones they give little kids to play with at preschool) or tie huge knots on the end of each ribbon.


Lucky for you, these only cost a buck or two, and a minimal time investment, so you'll feel just fine about your kids totally yucking them up! You can throw them right in the washer, or you can make more!