Showing posts with label altered projects. Show all posts

Tuesday, April 26, 2011

Somebody is making stuff again...

There are many types of creativity, some of which I have, some of which I don't.

I "Don't":
*Paint anything more complicated than a single color at a time
*Successfully make up new recipes, although I keep trying...sorry family...
*Have much luck sewing clothing without a pattern, although, sadly, I still try
*Have the "eye" for seeing future greatness in random ugly objects unless I have a specific project in mind and find exactly what I'm looking for.

My mother-in-law, on the other hand, is very adept at all four of these things - especially the last one. MY creativity is more like - give me a defined pile of stuff and I can make something out of it or show me a picture and I'll find my own way to copy it. HER creativity is more visionary - she can go into a thrift store, craft store or garage sale and pick out cool things that need a makeover, without knowing ahead of time what she's going to do with them. When she comes up with a cool project idea, she usually has just what she needs in her stash at home somewhere. She has the EYE!

I am so jealous of this.

This weekend, I got to pick through some destined-to-be-garage-saled items at my in-laws house and picked up a couple of "projects". I told her that I wanted to make a tray with glass jars on it for my laundry room. She presented me with this:
She had found it at a thrift store somewhere and bought it because she liked the shape and thought she could make something cool out of it. Unless I already knew I was looking for a tray, I would have passed right by this thing at the first sight of those, um, interesting, um, birds. She has skills, I tell you - mad skills!

She also had these jars:
Sweet! Once I had my pile of stuff, THEN I could figure out how to be creative with it. So...in case you find an ugly tray and some cool jars and want to transform then, here is how to do it.

You need:
*A Wooden tray (look for a shape/size that works - you'll be covering everything else)
*A couple sheets of coordinating patterned cardstock
*Matching acrylic paint and brush
*ModPodge and brush
*Cutting and measuring tools
*Glass jars
*Self-adhesive vinyl and cutting tool/machine (I used a Cricut Expression)

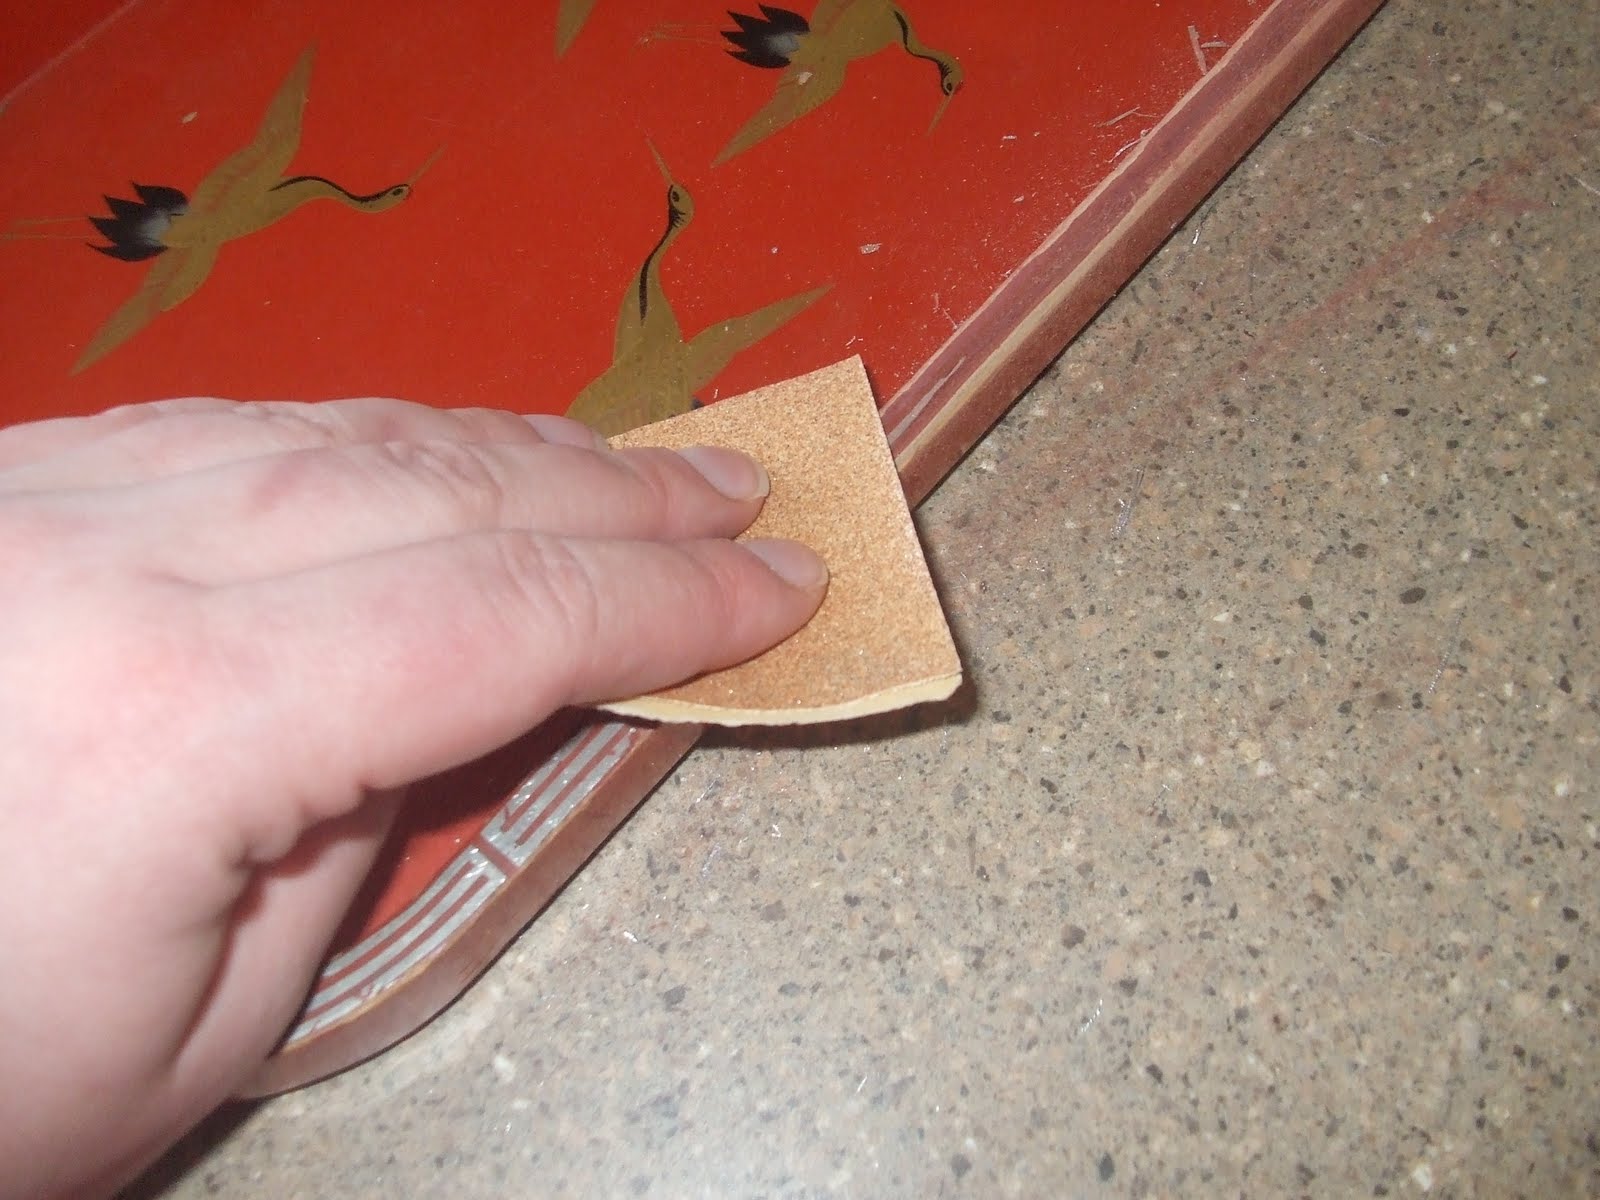
Step 1: Sand off anything that will easily come off - like gold leafing - and smooth out weird spots on the tray, perhaps turning on a Scentsy or something to mask the puzzling but unmistakable smell of vomit-laced fart coming from the tray while its being sanded (or maybe that was just MY tray...)
Step 2: Paint a couple coats of acrylic paint over the parts of the tray that may show when you're done. Marvel at your amazing paintery skills (seriously, this is as tricky as my painting gets):
Step 3: Spend several minutes testing your two rolls of black vinyl to try and figure out which one has permanent adhesive on the back and which one is repositionable. Kick yourself for not labeling them 4 months ago when the order arrived. Break out the Cricut and cut out the vinyl:
Step 4: Measure and cut your patterned paper to fit the parts of the tray where they will belong. This was a little tricky for the curved parts and I have no words of wisdom on how to do that other than, try tracing the bottom of the tray and measure carefully.
Step 5: Adhere paper to all sections of tray using ModPodge. Apply several coats to the top of the paper, allowing to dry between coats. Kick yourself for not using the "anti-bubbling trick" of coating one side of the paper with ModPodge and letting it dry and THEN adhering to the tray to avoid all the bubbles, creases and pulls you actually ended up with.
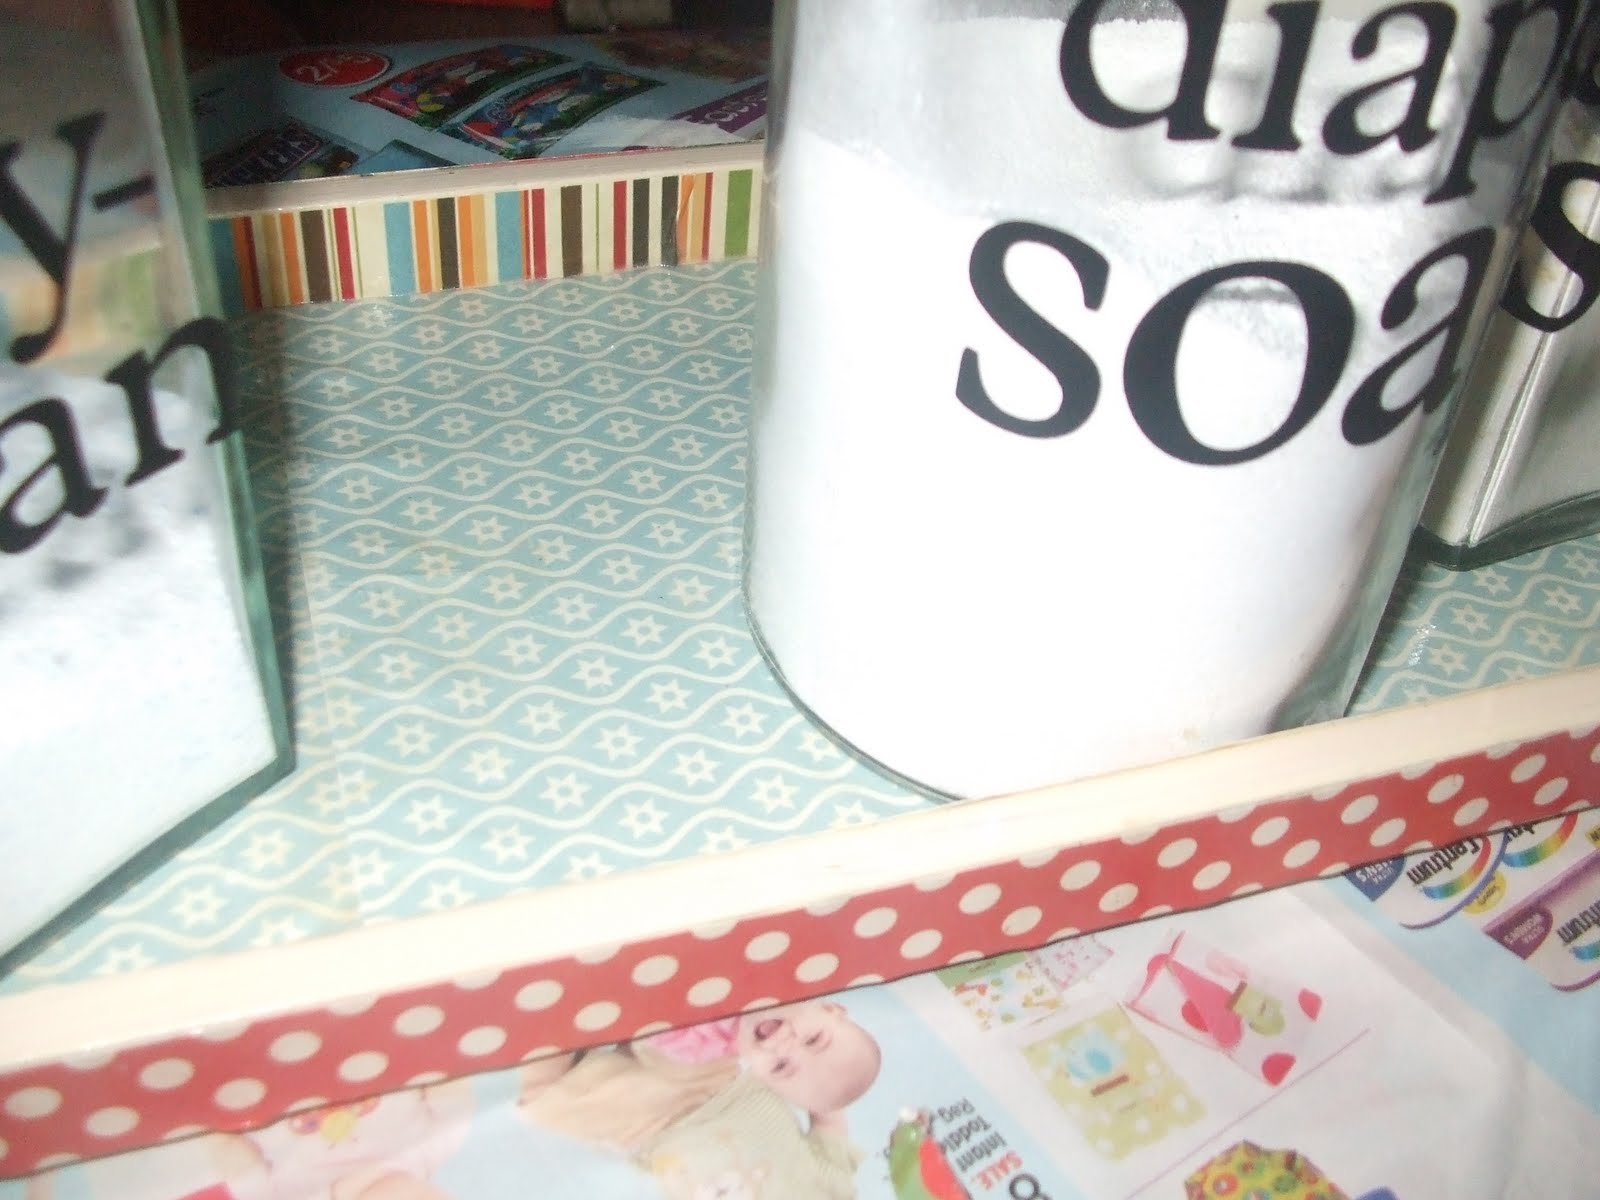
Step 6: Apply vinyl lettering to jars (which have been carefully washed with vinegar and water and dried). Fill jars with whatever you've got waiting for them:
Step 7: Decide that you have too many jars on the tray and lament the fact that you can barely see the cute patterned paper on the inside.
Step 8: Remove one jar and put it on a shelf somewhere else. Strategically place two dryer balls on the tray:
Step 9: Step back and admire your work...and then realize that your cute decoration doesn't really help the fact that the rest of the room is completely unfinished. More projects, right??

Wow - its hard to stage a cute photo for my project when there is nothing but a plain painted wall and a dusty washer and dryer. Oh well, this blog is about creating in REAL life, right?!

Now that I am healthier, have successfully birthed another baby and am starting to feel like I have energy to do more than nurse, eat, sleep and do the occasional load of laundry, I plan on doing more creating and blogging! Definitely check back on Thursday because I will be one stop on the MemoryWorks Simple Stories: Destinations Blog Hop! That means - more projects! See ya then!

Saturday, January 30, 2010

I've totally been making stuff!

Do you ever get in a crafting funk? Like you just can't figure out what to make...none of your projects are getting finished? And then when you're done with something...you hate it? But then...you suddenly get inspired, motivated or in some other way - get OUT OF THE FUNK! And creativity resumes! Hurray!

I've been enjoying the past few weeks of out-of-the-funk, madly making all kinds of things!

I finally pulled out some Moda squares and a jelly roll and made my Valentine's Day/St. Patrick's Day reversible table runner that I planned over a year ago:
I made some fun projects with the MemoryWorks January Express Kit:

I made a couple scrapbook layouts, for example:
I finally finished my 3-frame set...it has been sitting in my scrapbooking hutch taking up MUCHO space since October when I made the first one...yikes!
Now its hanging on the wall in our hallway - I have to smile every time I walk past - not because its so darn cute - but because I FINISHED IT! HAHA!

And, I got to spend all my free time for a week (which I think totaled about 13 minutes per day...I must have skipped a trip to the bathroom or something to get that much time at once!) working on the Simple Stories line from MemoryWorks. Since I'm on their creative team, I got an advanced set and got to play!

In true Sandy-fashion, I was only able to complete January-July of my full-year-overview album, because of course I only had pictures printed up for 7 months of the year! And my printer is broken! And now I'm on a budget so I couldn't just order me another 5 months on snapfish! Oh well...it just wouldn't be me if the entire project actually got finished all at once...that would just be weird!

Here is what I did so far - the fun thing about this system is that there are divided page protectors, so you just stick things in the pockets - easy, and used little adhesive...which for some reason I keep running out of lately...hmph... Here's a couple of the pages:


So....coming up.....I am still working on my faux-roman-curtains. I will do a tutorial and show you how to alter your mini-blinds without permanently disabling them. I have a few other things up my sleeve, but please let me know if you have any ideas for a tutorial that you'd like to see.

Have a GREAT day...and go do something crafty!

Friday, August 28, 2009

Repurposed Weird Baby Jeans + Moda Charm Pack = Quick, Cute, TOTALLY Do-able!

Everybody ready for a tutorial?? This is one of my favorite projects of the summer! It turned out really cute, was incredibly cheap (we're talking like $2-3 for the entire outfit, folks!), is fast to make...and is VERY "operator error"-friendly!

Here we go: Cute, huh?!

This is what you need to decorate your baby in such chic cuteness:

*A onesie or T-shirt (you probably have one at home you can use...so that would be FREE, my friends!)

*An awkward pair of thrift-store pants. This particular pair has unusually short legs compared to the size of the waist...and denim sweatpant capris are never flattering, right?! (Awkward thrift-store pants: FREE to me, but if you went out and bought them...like $1-2, right?)

*10 squares from a Moda charm-pack (5" squares if you're cutting your own). I used "Objects of Desire".

*Sewing machine, serger is helpful, thread, rotary cutter, scissors, embroidery floss/needle


First, lop off the pant legs. You can make them shorts:


Or cut a little higher and make a skirt, like I did:

Lay out your outfit so you know what you're doing and what fabric you want next to what:

Cut your charm squares in half - put one stack aside, you only need half of the halves. I can't really tell you how many total squares you'll need, because your cut-up pants might be a different size than mine...I think I used 10 or so - you need enough to go around the base of your skirt about 1 1/2 times (you'll be gathering):


Sew all the charm square halves in a long strip like so:

Cut down the center, lengthwise, of the strip with a rotary cutter:

Sew the ends of the strips together to make a circle:


Two things to do here -- 1.) serge all around along the bottom edge of your circle (or zigzag or whatever you want to do to finish it) and 2.) machine baste around the top edge:

Pull the machine-basting-thread to gather into a ruffle:

Adjust the basting so that the ruffle fits the bottom of your skirt and is fairly evenly gathered. Pin to the INSIDE of the skirt, sticking out as shown:

Sew 1/4" or so along the bottom edge of the skirt to attach the ruffle. Leave the edge of the denim part "raw" as shown:


Remember those awkward pant legs you lopped off? Cut a few strips from them and attach a few around the waistband for some funky belt loops (leave edges raw):

Here's what we have now:


Now, go throw it in the washing machine, get it good and wet -and then throw it in the dryer. All those raw edges will get nice and frayed! Then find a long, cute ribbon to thread through the belt loops for a belt.


If you want to make a matching shirt (and I stole this idea from my friend JILL, who stole it from our friend TRISH)...stick a charm square under the top layer of the shirt and using embroidery floss and a needle, stitch a shape over the top of it. Then use some sharp scissors and cut out the T-shirt area inside the shape to let the charm square show through.


Do NOT do this, which I did:


I tried to cut the hole before doing the stitching. This was not a great idea, it was not fun, and it turned out weird. Still cute, but weird. I should really have clarified the directions before I tried it :)


When you're all done, you'll have yourself one sweet little outfit...AND you can be all impressed with yourself for "recycling"!

Saturday, May 9, 2009

MemoryWorks May Express Kit

The May Express kit from MemoryWorks was so fun to work with - the papers and embellishments reminded me of 80's cartoons - Rainbow Brite, CareBears, Smurfs... you get the idea! So here's to first grade!


This one is my favorite - I sewed 2 layers of a Prima layered fabric flower together with a button on top, made 2 leaves out of some scrap fabric (sewing and scrapbooking coming together! Ah! The awesomeness! The awesomeness!), and sewed all of it to the center of a long ribbon. Tie around baby's head - instant boutique chic! More pictures of this on the MemoryWorks blog


The mat for the cupcake in this one is actually one of the layers of the same Prima flower I used on the baby headband:

(I don't know if I'm getting lazier or getting smarter...but lately my layouts have been really simple...)

The above headband accessorized by the cutest baby in the universe:

The inside of this card says, "I hope the apple doesn't fall far from the tree, because you're a great Mom!"
I hope everyone has a spectacular Mother's Day...I'm off to do more laundry so I can take the day OFF tomorrow!

Thursday, February 12, 2009

Quick Projects for Valentine's Day!

Happy Valentine's Day! Here are a couple of ideas for those of you who have forgotten (GASP!) to get a little something for your sweetie, or who need a cheap and fast idea to dress up something you already picked up!

Candy Box Card

This is so cheap and easy, its not even funny...all you need to do is get one of those 4-piece chocolate heart-shaped candy boxes at the grocery store (cost: $1.50) - you could do a bigger one, of course, but the small ones are fun for a card - take off the plastic wrapper and make a card on the top of it. Just fold a piece of paper in half and trace the shape of the box lid on it, leaving the fold on one edge so the two layers open up like a card. Glue it on and decorate it!

I used the MemoryWorks February Express Kit to decorate mine...seriously this was a great kit - packed with lots of "extras" and fun paper!

If you want to cover the sides of the box, as shown above, just cut a piece of paper the width of the box (this one was just under 1"), then wrap it around the box, just tacking it down with a couple of glue dots on the BOTTOM half of the box. That way you'll still be able to open and close the box. It wouldn't be so cute to have the box glued shut...maybe for April Fool's Day...

You can decorate the inside, too:


Wouldn't this be fun for Mother's Day, or an anniversary, or even a get-well gift? How nice would it be to get something like this when you're in the hospital after having a baby?! And it takes no longer to make than a regular card! And if you wanted to get really tricky...you could make a whole mini-album to stick to the top (or inside the box) rather than just a card.

Valentines

I made these with the February Express Kit, also. These are "mini-cards", only about 2x3 inches after they're folded - perfect for cute little valentines!

This one is made out of a Heidi Swapp file folder (I think they're about 4x6 or so...?). The idea here is to slide pictures or a gift certificate of something fun inside:

And while I'm at it...this one isn't a valentine, but since I made it at the same time, with the same materials, I'll share this one, too!

And for those of you who think I made a card for "Steve" or a "stove", like my husband thought when he saw it, it says, "S T * V...miss U" on it. Get it?

Strawberries Dipped in Kisses

Have you tried the new Special Dark Hershey's Kisses? YUM! They are really, really good - not too sweet, but without the typical bitter dark chocolate aftertaste. Just unwrap a few (1-2 per strawberry, depending on how big your strawberry is) and pop them in the microwave until melted, stirring frequently. Dip strawberries in chocolate (or drizzle on top) and let cool on a wire rack. Feed to your sweetie in a seductive manner:)

Sweet Heart Pillows

You can make these out of fabric scraps (or Moda charm packs) in 5-10 minutes for each one. Use whatever you've got on hand to be your heart template - cookie cutter, Coluzzle template, cut one with your cricut...or just cut a shape out of a piece of paper!

Trace heart on the wrongsides of 2 pieces of fabric, cut out. Place right sides together and sew around entire heart EXCEPT for about 2 inches on one side. Clip corners/curves and turn right-side out through the 2 inch gap you left. Stuff with fiberfill, then slipstitch the hole closed. If you're feeling particularly tricky, you can then decorate your hearts by handsewing or glue-gunning ric rac, flowers, buttons, etc. on your hearts.

I thought these would be cute with a bunch of them in a basket as a centerpiece, or one on each plate at a place setting, or even strung together to make a cute 3-D garland across your mantel or window.

**You'll notice that I don't have a picture of *mine* yet...that is because....

I have jumped on the Moda Fabric bandwagon and just ordered a bunch of charm packs and layer cakes...including a Valentine's Day themed charm pack...but alas, they haven't arrived yet. SO SAD! I was hoping to make myself a cute V-day table runner and/or place mats or something, as well some of those little heart pillows, but I'm too late for this year. I just can't bring myself to make holiday related sewing projects AFTER the given holiday- I've got to wait 6 months and then its BEFORE the next holiday again! So, I guess I'll save that project for next year!

For the Kids: Castle Valentine's Box

I just had to share this project that I did with my 7 year old daughter for a school contest (which she won!). I helped her cut out shapes with my cricut machine and demonstrated how to use the stamps, etc. - but by and large, she did most this herself! You could use anything you have on hand - die cuts, stickers, stamps, coloring pages, even stamps!


Treat Yourself!
If you feel the need to give yourself a Valentine's Day gift, here are a couple of fun deals I found this week:
**Fabric Depot is having a great sale on Moda fabric pre-cuts - pick up some really cute charm packs, layer cakes (10" squares) etc. for up to 40% off! This was cheaper than ebay! Hopefully mine will be here next week...I'm going to try to make some table runners and couch pillows out of them!
**MemoryWorks has some really cute Valentine's Day stuff in the online boutique. There is also a spring cleaning sale going on - check through your favorite products for lower prices!
Happy Valentine's Day!