Showing posts with label home decor. Show all posts

Tuesday, April 26, 2011

Somebody is making stuff again...

There are many types of creativity, some of which I have, some of which I don't.

I "Don't":
*Paint anything more complicated than a single color at a time
*Successfully make up new recipes, although I keep trying...sorry family...
*Have much luck sewing clothing without a pattern, although, sadly, I still try
*Have the "eye" for seeing future greatness in random ugly objects unless I have a specific project in mind and find exactly what I'm looking for.

My mother-in-law, on the other hand, is very adept at all four of these things - especially the last one. MY creativity is more like - give me a defined pile of stuff and I can make something out of it or show me a picture and I'll find my own way to copy it. HER creativity is more visionary - she can go into a thrift store, craft store or garage sale and pick out cool things that need a makeover, without knowing ahead of time what she's going to do with them. When she comes up with a cool project idea, she usually has just what she needs in her stash at home somewhere. She has the EYE!

I am so jealous of this.

This weekend, I got to pick through some destined-to-be-garage-saled items at my in-laws house and picked up a couple of "projects". I told her that I wanted to make a tray with glass jars on it for my laundry room. She presented me with this:
She had found it at a thrift store somewhere and bought it because she liked the shape and thought she could make something cool out of it. Unless I already knew I was looking for a tray, I would have passed right by this thing at the first sight of those, um, interesting, um, birds. She has skills, I tell you - mad skills!

She also had these jars:
Sweet! Once I had my pile of stuff, THEN I could figure out how to be creative with it. So...in case you find an ugly tray and some cool jars and want to transform then, here is how to do it.

You need:
*A Wooden tray (look for a shape/size that works - you'll be covering everything else)
*A couple sheets of coordinating patterned cardstock
*Matching acrylic paint and brush
*ModPodge and brush
*Cutting and measuring tools
*Glass jars
*Self-adhesive vinyl and cutting tool/machine (I used a Cricut Expression)

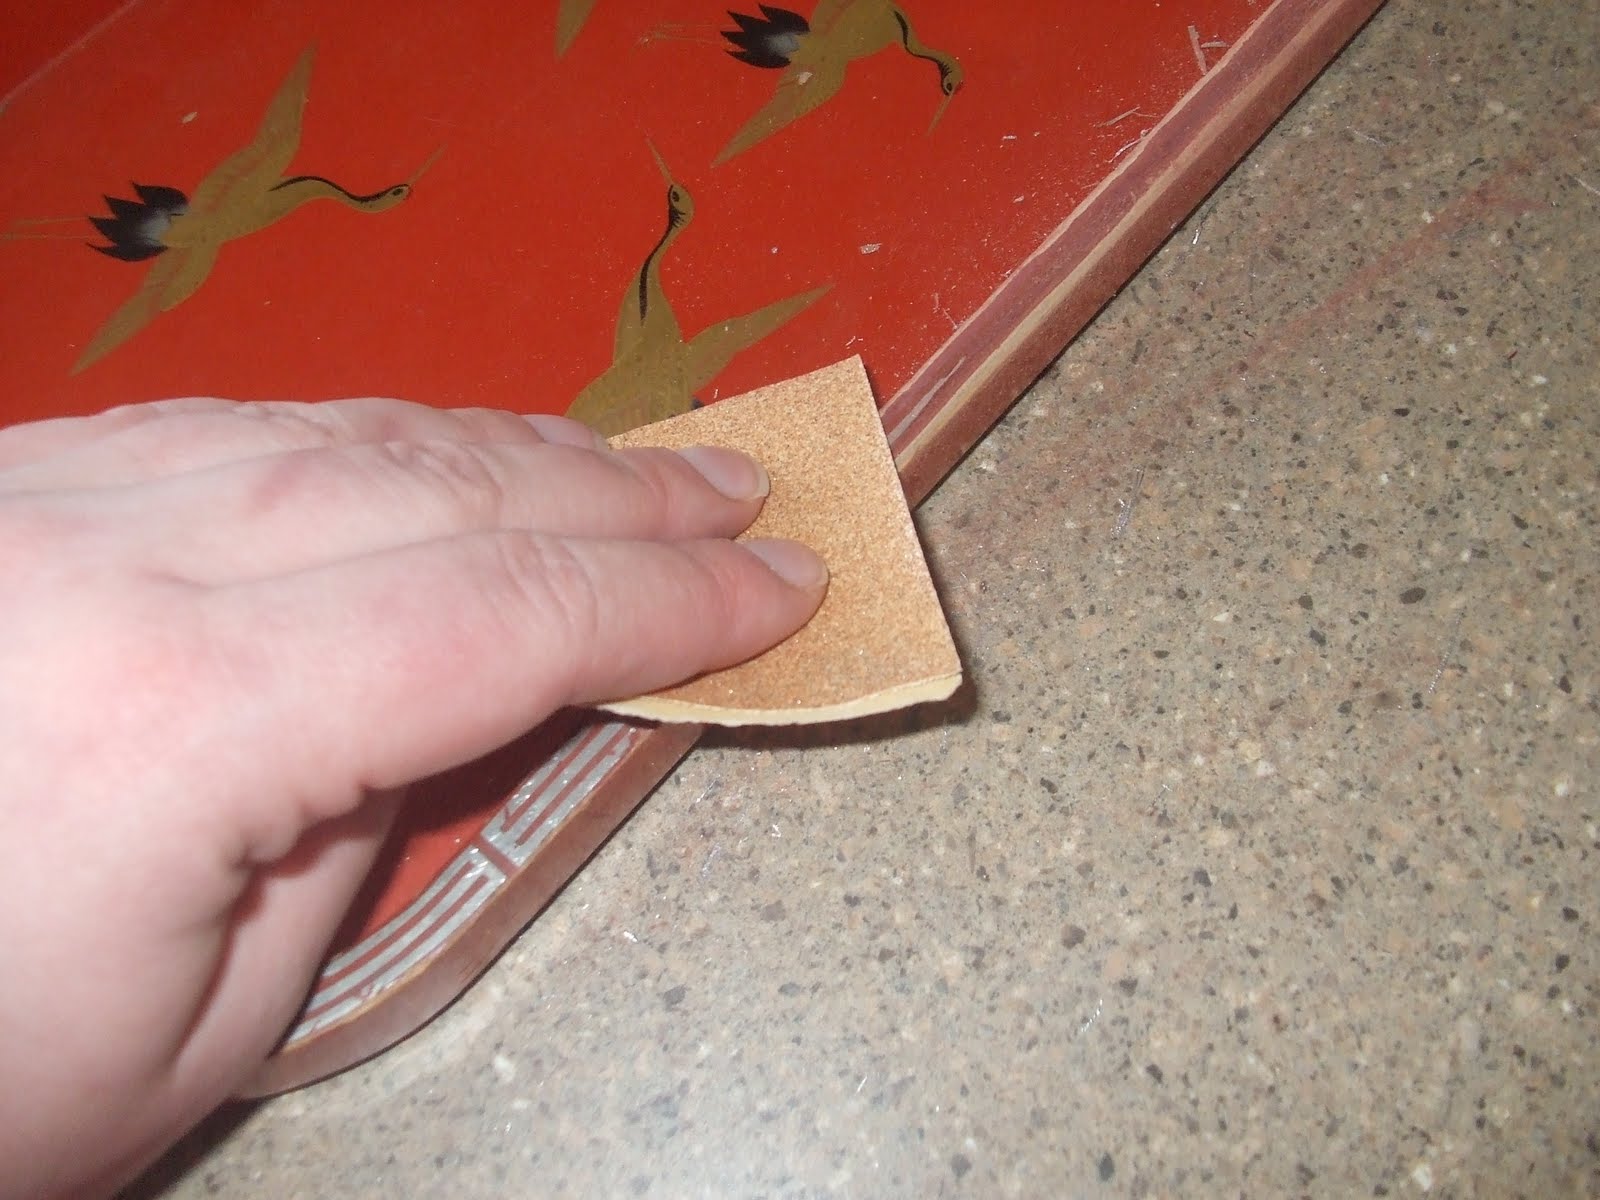
Step 1: Sand off anything that will easily come off - like gold leafing - and smooth out weird spots on the tray, perhaps turning on a Scentsy or something to mask the puzzling but unmistakable smell of vomit-laced fart coming from the tray while its being sanded (or maybe that was just MY tray...)
Step 2: Paint a couple coats of acrylic paint over the parts of the tray that may show when you're done. Marvel at your amazing paintery skills (seriously, this is as tricky as my painting gets):
Step 3: Spend several minutes testing your two rolls of black vinyl to try and figure out which one has permanent adhesive on the back and which one is repositionable. Kick yourself for not labeling them 4 months ago when the order arrived. Break out the Cricut and cut out the vinyl:
Step 4: Measure and cut your patterned paper to fit the parts of the tray where they will belong. This was a little tricky for the curved parts and I have no words of wisdom on how to do that other than, try tracing the bottom of the tray and measure carefully.
Step 5: Adhere paper to all sections of tray using ModPodge. Apply several coats to the top of the paper, allowing to dry between coats. Kick yourself for not using the "anti-bubbling trick" of coating one side of the paper with ModPodge and letting it dry and THEN adhering to the tray to avoid all the bubbles, creases and pulls you actually ended up with.
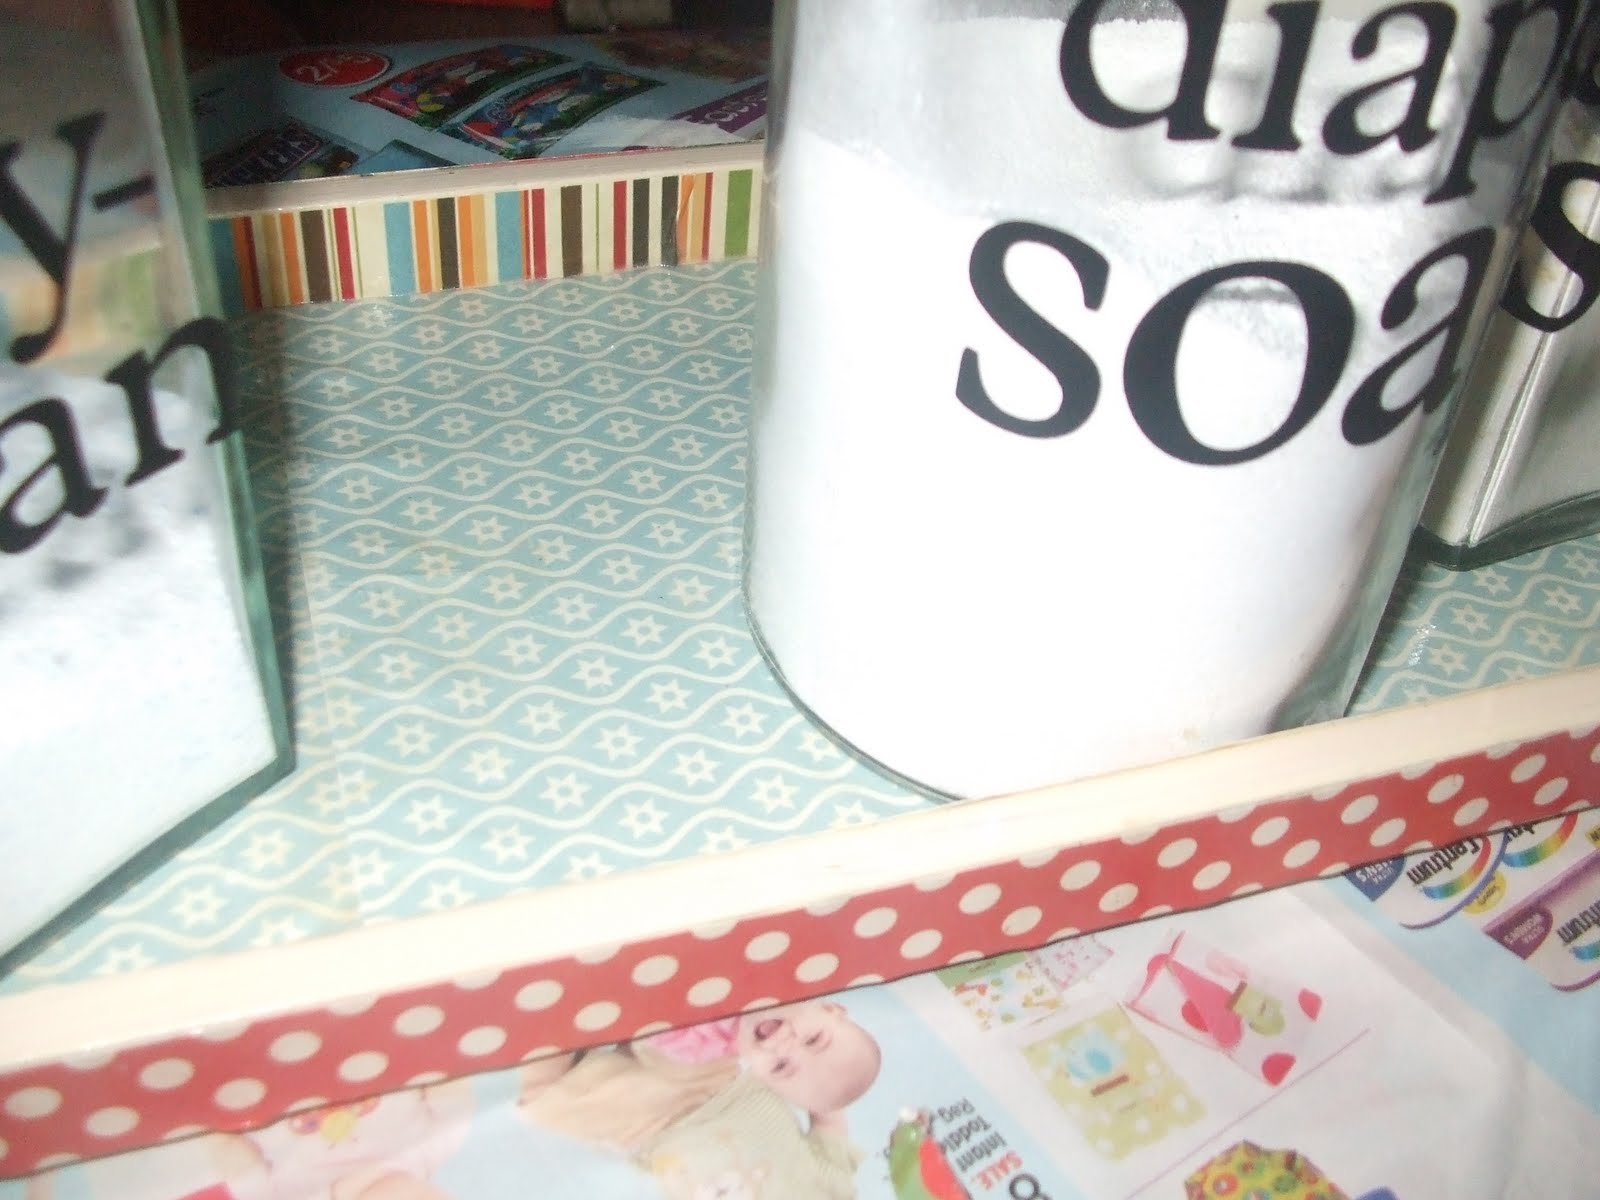
Step 6: Apply vinyl lettering to jars (which have been carefully washed with vinegar and water and dried). Fill jars with whatever you've got waiting for them:
Step 7: Decide that you have too many jars on the tray and lament the fact that you can barely see the cute patterned paper on the inside.
Step 8: Remove one jar and put it on a shelf somewhere else. Strategically place two dryer balls on the tray:
Step 9: Step back and admire your work...and then realize that your cute decoration doesn't really help the fact that the rest of the room is completely unfinished. More projects, right??

Wow - its hard to stage a cute photo for my project when there is nothing but a plain painted wall and a dusty washer and dryer. Oh well, this blog is about creating in REAL life, right?!

Now that I am healthier, have successfully birthed another baby and am starting to feel like I have energy to do more than nurse, eat, sleep and do the occasional load of laundry, I plan on doing more creating and blogging! Definitely check back on Thursday because I will be one stop on the MemoryWorks Simple Stories: Destinations Blog Hop! That means - more projects! See ya then!

Thursday, February 4, 2010

Make a Valentine's Day Garland...so easy a 4 year old boy can make it!

Yesterday my son and I decided that our house was woefully undecorated for Valentine's Day. I have my table runner (see last post) and a few heart-shaped decorations...and that's it. SO...we pulled my box of February MemoryWorks Express kit...land made this:
I kid you not, this took us 30 minutes! Easy as pie, and you probably have the supplies you need to make your own version at home!

All you need:
*6 chipboard squares - mine were from a Fancy Pants chipboard book set (12x12 Biggest Board Book It set) - but you could even cut yours from a cardboard box if you want. They are each about 3 1/2" square, with rounded corners
*6 pieces of matching patterned paper - also 3 1/2" square each. I used the Crate Paper "Mia" collection - so pretty!
*Chipboard letters (or large letter stickers or someting) to spell out "LOVE". I used My Mind's Eye embossed chipboard
*Some fun things to embellish - diecuts, stickers, buttons, etc. I used some Crate Paper "Mia" glitter die-cuts, flowers from Prima and Petaloo and buttons by Creative Imaginations.
*You also need some ribbon...I used pink and blue sheer ribbon that I had leftover from other projects...you just need something that coordinates - and long enough pieces to tie all the letter square together AND hang it from your location of choice :)
*A crop-a-dile or other tool that will hole-punch through chipboard.

Let's get started! Seriously...my 4 year old did most of the steps - so he will be my tutorial model today!

1. Glue your paper to each square...Use a brayer or other smoothing device to get it down good and tight:

2.) After the glue is dry, sand the edges of each piece:
3.) Use an ink pad to ink each embossed letter:
4.) Here's the part where you get to go crazy - arrange the squares and letters how you like them, glue down the letters...and then embellish like crazy! You can refer back to my picture at the top, or do your own thing!

5.) When everything is ready to go, punch holes through the sides of each square (punch towards the top or your squares will flip over when you hang them) and tie them together with pieces of ribbon. I also tied buttons together on each end before tying on my "hanging ribbons", as shown:
Here's another hanging shot...I apologize for the dark photo - its nearly impossible to get a good picture straight at a bright window!
This was so easy to make..and turned out so cute, that I think we'll be making a "lucky" one for t. Patty's day...an egg one for Easter...4th of July....oh yes, we will be making many garlands, haha!

Have fun! Let me know if you try it - I'd love to see some pics!

Saturday, January 30, 2010

I've totally been making stuff!

Do you ever get in a crafting funk? Like you just can't figure out what to make...none of your projects are getting finished? And then when you're done with something...you hate it? But then...you suddenly get inspired, motivated or in some other way - get OUT OF THE FUNK! And creativity resumes! Hurray!

I've been enjoying the past few weeks of out-of-the-funk, madly making all kinds of things!

I finally pulled out some Moda squares and a jelly roll and made my Valentine's Day/St. Patrick's Day reversible table runner that I planned over a year ago:
I made some fun projects with the MemoryWorks January Express Kit:

I made a couple scrapbook layouts, for example:
I finally finished my 3-frame set...it has been sitting in my scrapbooking hutch taking up MUCHO space since October when I made the first one...yikes!
Now its hanging on the wall in our hallway - I have to smile every time I walk past - not because its so darn cute - but because I FINISHED IT! HAHA!

And, I got to spend all my free time for a week (which I think totaled about 13 minutes per day...I must have skipped a trip to the bathroom or something to get that much time at once!) working on the Simple Stories line from MemoryWorks. Since I'm on their creative team, I got an advanced set and got to play!

In true Sandy-fashion, I was only able to complete January-July of my full-year-overview album, because of course I only had pictures printed up for 7 months of the year! And my printer is broken! And now I'm on a budget so I couldn't just order me another 5 months on snapfish! Oh well...it just wouldn't be me if the entire project actually got finished all at once...that would just be weird!

Here is what I did so far - the fun thing about this system is that there are divided page protectors, so you just stick things in the pockets - easy, and used little adhesive...which for some reason I keep running out of lately...hmph... Here's a couple of the pages:


So....coming up.....I am still working on my faux-roman-curtains. I will do a tutorial and show you how to alter your mini-blinds without permanently disabling them. I have a few other things up my sleeve, but please let me know if you have any ideas for a tutorial that you'd like to see.

Have a GREAT day...and go do something crafty!

Friday, August 28, 2009

Quick and Easy Bulletin Board

I posted a simple but fun bulletin board idea over at the MemoryWorks blog today - check it out:

Message Board, Jr.

Oh, and if you go down a few entries to last Friday's, you'll find a more grown-up and very cool version of a message board by my friend Lacey!

Wednesday, April 1, 2009

Show and Tell!

I know you've been DYING to see what else I did with my Moda fabric, right? (The nice thing about cyberspace is that I can pretend to be as popular as I want...)

As I've mentioned before...after spending several months cooped up in my huse with an RSV baby...and staring at all of my walls and belongings for days on end...I decided that my college-era couches and free/nearly free ugly slipcovers were not worthy of my new living room and began an overhaul. I supressed my inner-cheapskate and SureFitted my couches with new slipcovers (okay - I guess I was still being a cheapskate...the slipcovers were like a bajillion times cheaper than whole new couches!) and set to work on the new throw pillows.

Because I'm a little dorky (okay, a lot), I decided that I would make my living room match a wall hanging I'd made for MemoryWorks last fall. I liked it so much, I kept it around all year (except during Halloween and Christmas, because that would have just been weird, right?).


Luckily Moda came to the rescue and I found that the Tranquility and Cottom Blossoms lines were pretty close to what I wanted.


I had a great time making them...then found that I didn't have quite enough fiberfill to do the job...and that I sewed some of the seam allowances too small and some were coming open...but by that time I'd already sewed them shut. Luckily I had a stash of felt flowers and buttons in my scrapbooking hutch (as I frequently tell my husband, SCRAPBOOKING is for EVERYTHING) that I sewed on to cover my boo-boos. So now you know.:) And I'll also admit that I closed up a couple of the tiny holes in the seams with fabric glue...I know, professional.


Then I decided to make a table runner. I need to back up and tell you that I have made 3 quilting projects in my life. The first was a Halloween wall-hanging I found in a magazine 5 years ago or so. I didn't really follow the directions...and didn't really have any clue how to quilt, bind, piece, etc. so its a bit lumpy and a lot lopsided. But I still proudly display it every Halloween and in a few years I'll just say the KIDS MADE IT, haha! The second two projects were quilts for my kids' beds - also loosely based on patterns I bought - they were cute, as long as viewed from several feet away. Moral of the story: I am not a quilter.


BUT, the Moda fabric deserved better (the other projects were done with WalMart fabric, which I think is breaking some sort of cardinal rule of quilting), so I really tried to actually figure out what I was doing on this one. I found a couple of tutorials (Thanks, Camille Roskelley!) and made myself a top from a Cotton Blossoms charmpack and a Sugar jellyroll. No cutting or measuring - I may be able to like this style of quilting!!

I used a walking foot to quilt it - whoa! Huge difference! - and actually bound it like I'm supposed to. Surprise, surprise - it actually worked out! Who knew? Just like finding out that butter actually DOES bake better than margarine! Whoa!

But, of course, I had to Sandy-fy it, (Sandy-fy: 1.) not completely follow the directions, 2.) Be cheap, 3.) Save time and effort later), so I made it reversible!


Now I want to make table runners for all the different seasons and holidays (all reversible to save me some backing fabric and time). Next time I won't use polyester batting, though - this one turned out a little too puffy.

I'll let you in on my dirty little secret. I've become a bit of a cool fabric junky lately... The internet is just too accessible...


So I have my Moda charm pack collection:


My Amy Butler will-be-an-apron fabric:


Sandi Henderson Farmer's Market fabric to make my daughters' Easter Dresses out of:


And then there is that teensy, weensy little obsession with Fat Quarter Friday at our local fabric store - last Friday of the month is 10 for $15. I never went to it...until last month...and this month...and YIKES. It's a lot of fun. They even have a little Moda, haha!


Anyway...there you go. All caught up on my fabric projects the past few months (except those pesky apron tutorials that I haven't posted yet). This month I need to get cracking on some scrapbooking things, too, so be watching for that!


And don't even think about asking me for a picture of my whole living room, because I won't do it until I'm done. So there.

Saturday, February 21, 2009

Make a Super Fast Chubby Potholder!

I'm in the middle of "revitalizing" my living room, dining room and kitchen. Case in point: My nasty 10 year old potholders...yeah...not so cute! So - nasty potholders + some brand new Moda charm packs = new potholders!

I do not have the patience to get too tricky with my sewing projects...so if you're too much of a perfectionist (for some reason, my perfectionist tendencies end when I start sewing...go figure!), this project probably isn't for you...but if you need a quick, fun little something - give it a try!

This is what I made with my daughters today:

Cute, huh? If you'd like to try to make some yourself, all you need for each one are:
*One 10"x10" fabric square (mine are from a Moda Tranquility layer cake)
*Four 5"x5" squares (we mixed and matched from Moda charm packs - Zippidy Doo Dah, Cotton Blossoms and American Primer)
*Two layers of approx. 10"x10" batting (I just used the cheap stuff from WalMart - no use wasting expensive stuff on potholders!)
*One 5" length of coordinating ribbon
*Thread, sewing machine and/or serger

1.) Place 2 of the 5x5 squares right side together, sew along one edge (scant 1/4"...I serged mine). Repeat with the other 2 squares.
2.) Line up the two pieces from step 1, face to face, as shown and sew scant 1/4" (or serge) along one edge to create a large square:
3.) Iron all your pieces so the seams lie flat:
4.) Make a "quilt sandwich" by layering the 10x10 square on the bottom (right side down), then the 2 pieces of batting, then the other piece (right side up). Line up the corners of the fabric as best you can (the top square will be slightly smaller than the bottom square):
My stack of "sandwiches":
5.) With your sewing machine (this part won't work on the serger!), sew through all layers along the seams on the top piece. Its much easier to keep it from puckering if you sew one long line first, then do the cross-line in 2 sections, starting from the center and working to each outer edge:
6.) Fold the ribbon in half and tack down to the center of one of the sides, with the loop pointing towards the center of the potholder:
7.) If you want to, stick a couple pins along the edges to keep the layers together. This is the part where you can be as tricky or simple as you want. I did the "fast and furious" method - I just serged all the edges. You could also make a binding (like quilting) or use some sort of pre-made edging on it:
All done!
I made these over-sized on purpose - they're bigger to accomodate an entire pot bottom if you have something sitting on it...or you can fold it in half and its a great size for picking things up:

Total time (not counting cutting fabric...the Moda stuff saves a LOT of time since its pre-cut!) - about 10 minutes per potholder!

Let me know if you give it a try and what you do to make yours prettier than mine:) I might do something with the edges of mine later...